Tuesday, October 9, 2012

Mass Effect 2 M-97 Viper Sniper Rifle

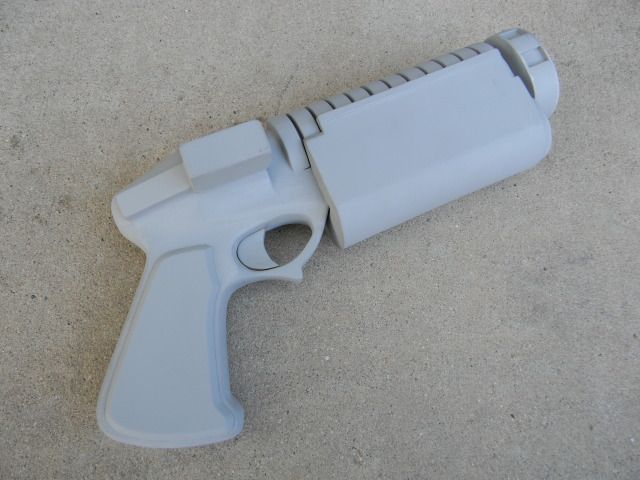
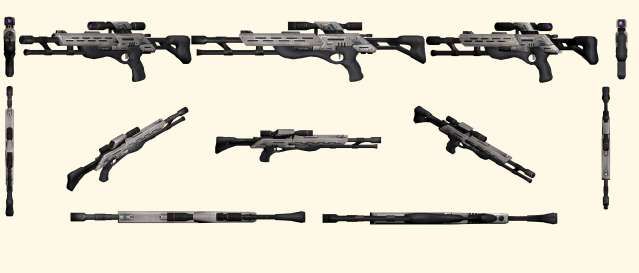
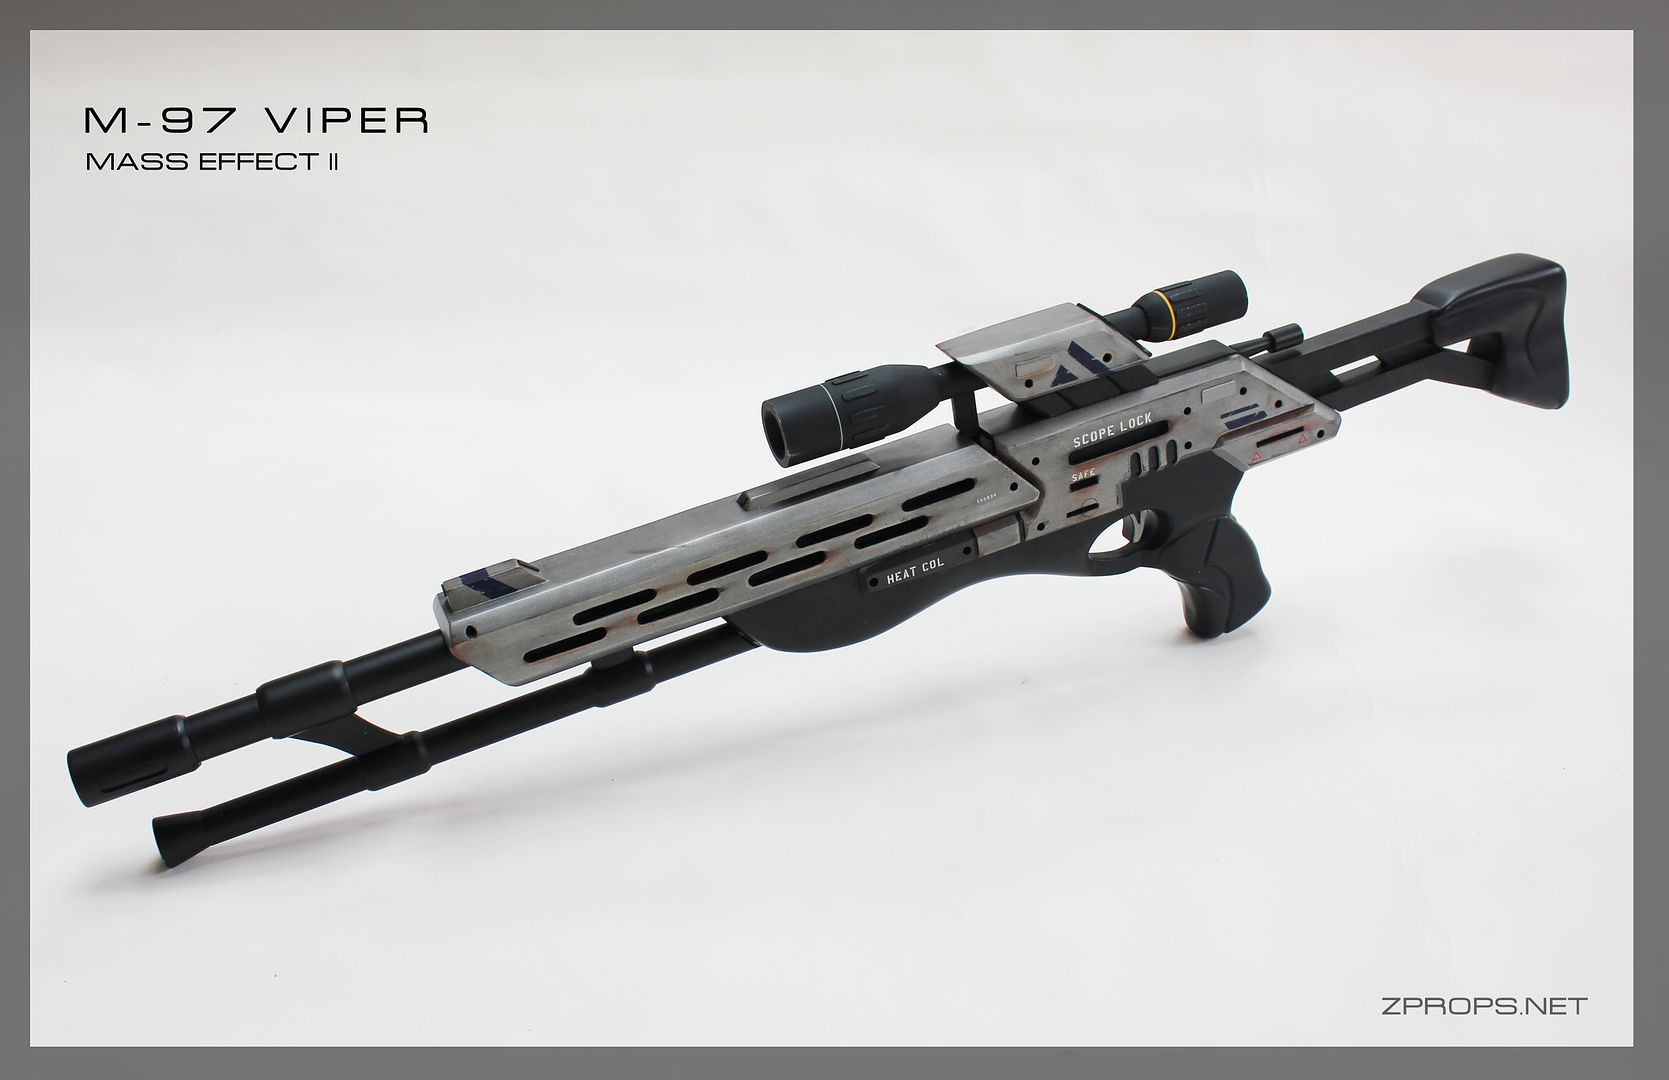
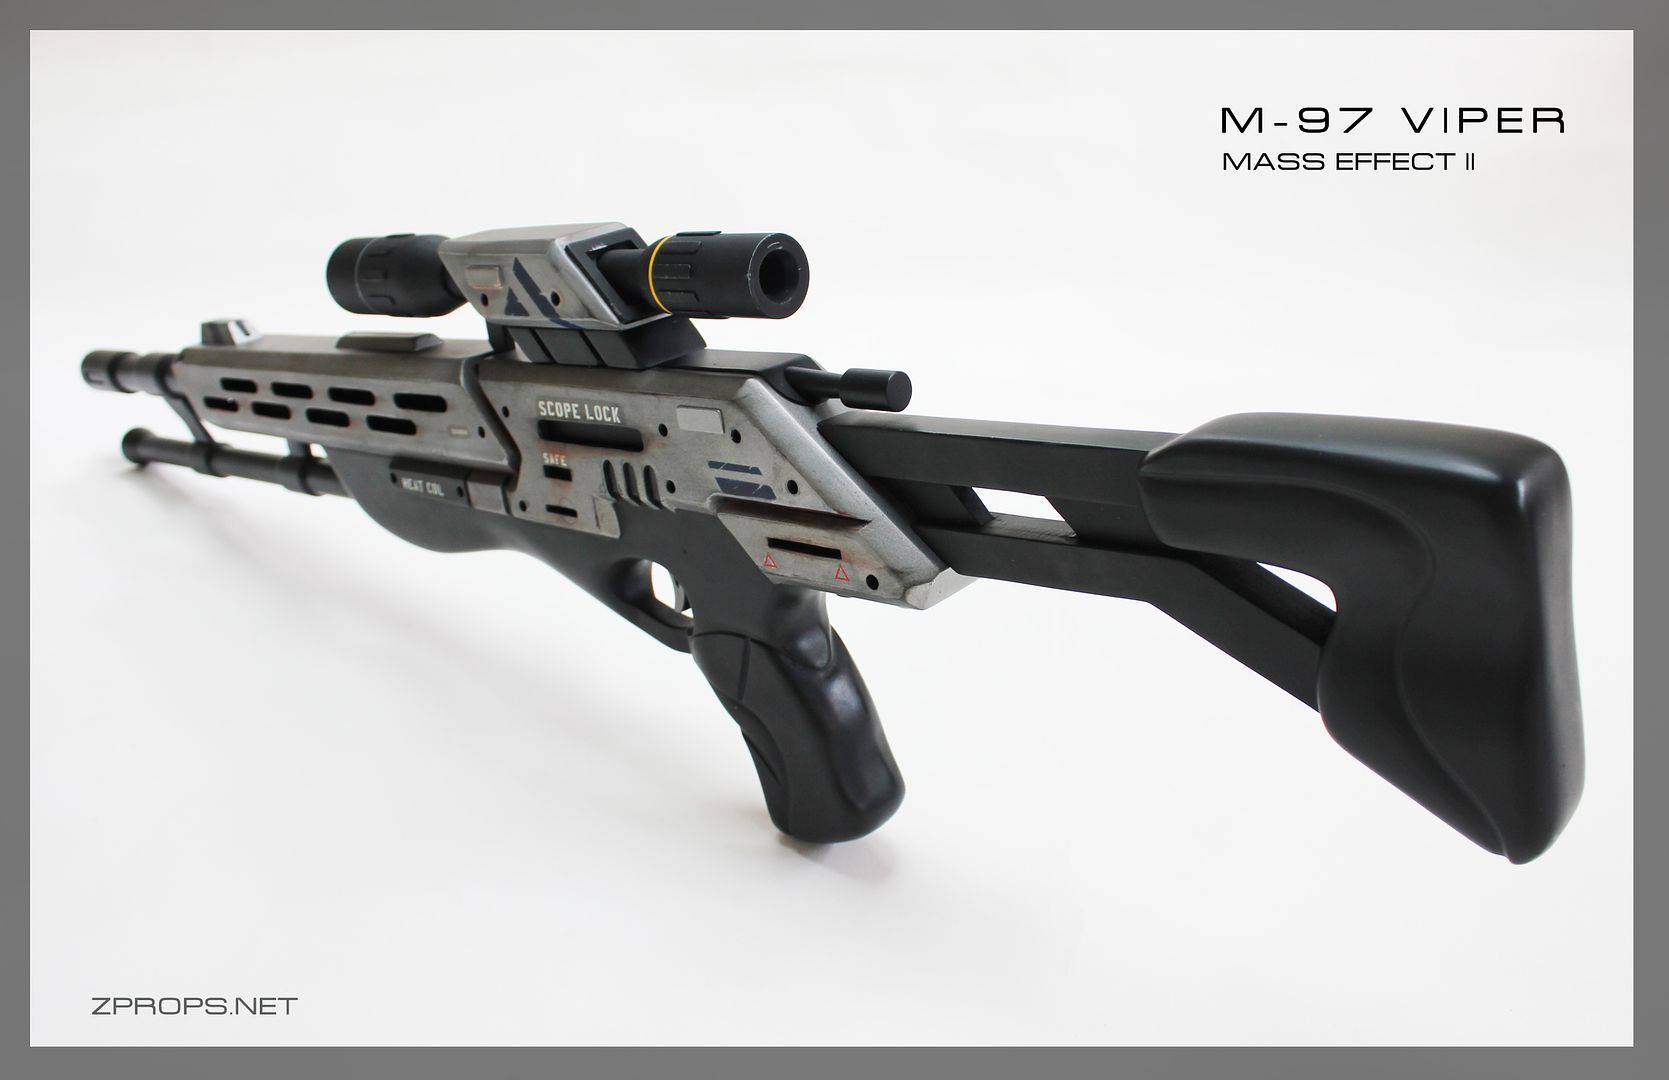
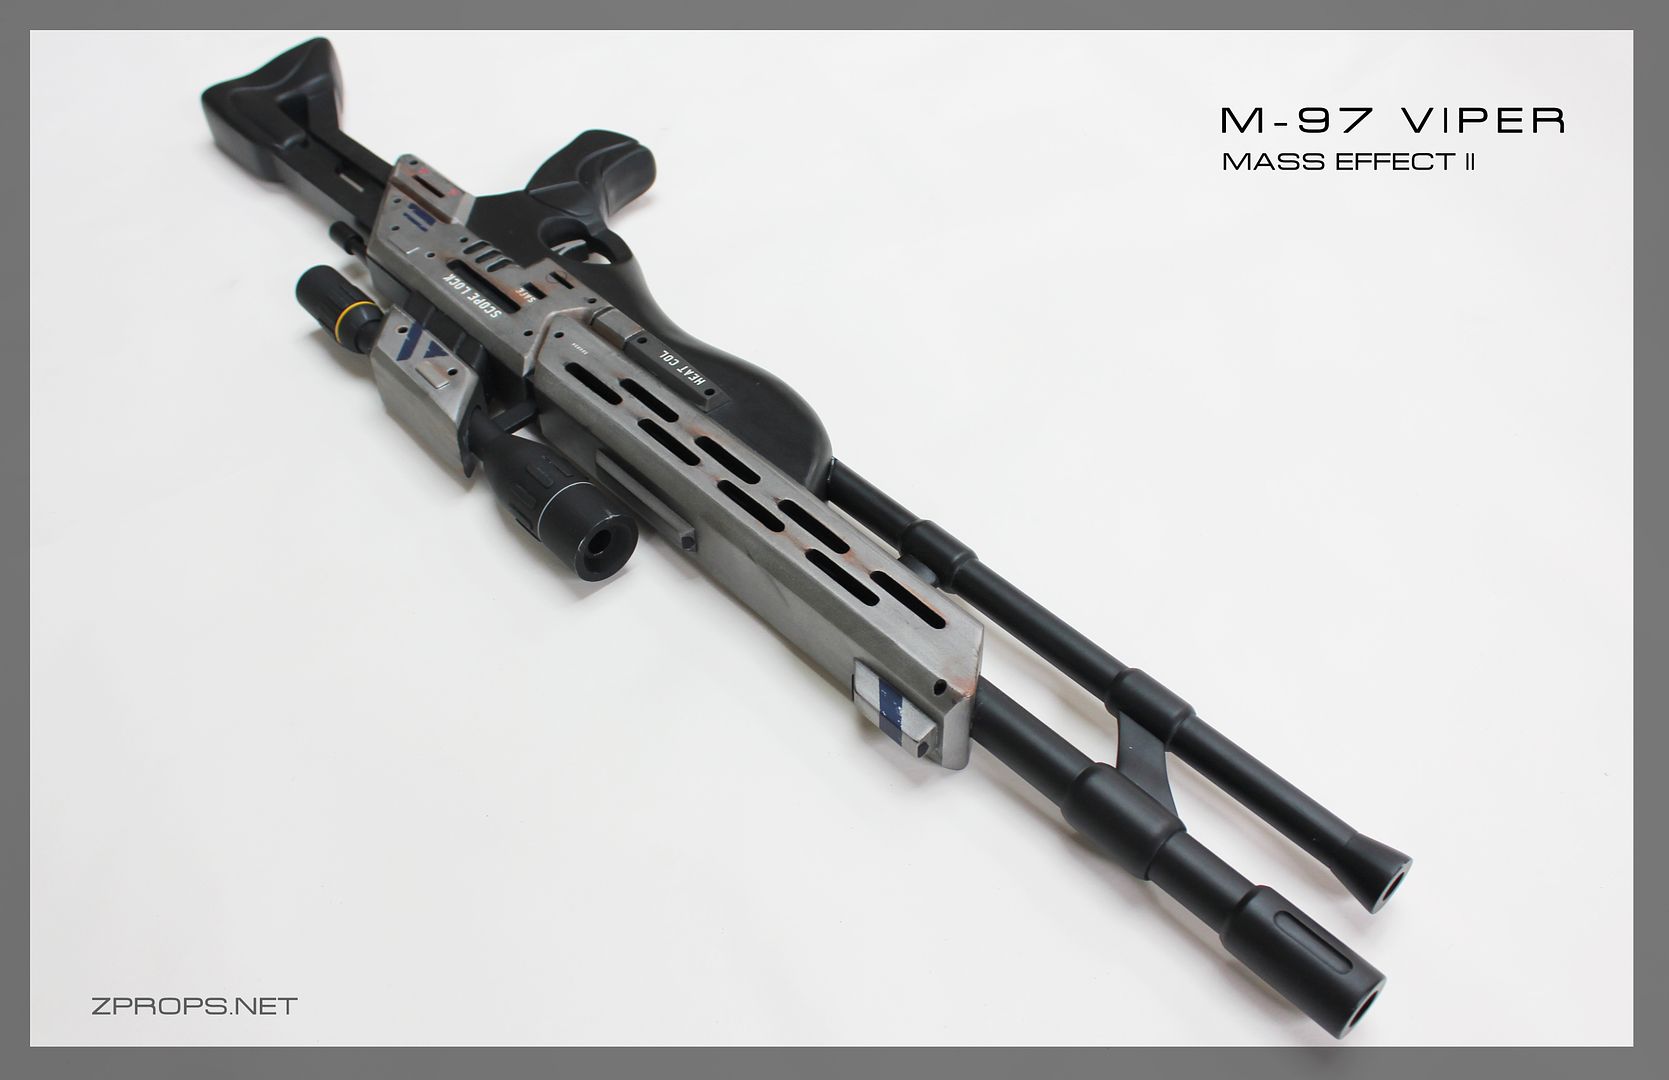
Earlier This year I was contacted to make this thingie from Mass Effect II. (Something new and different, right?)


As always, thanks to troodon80 for the reference picture.

Here's another shot with Garrus, which serves as a good scale factor. I scaled it to 42" long if I recall correctly.


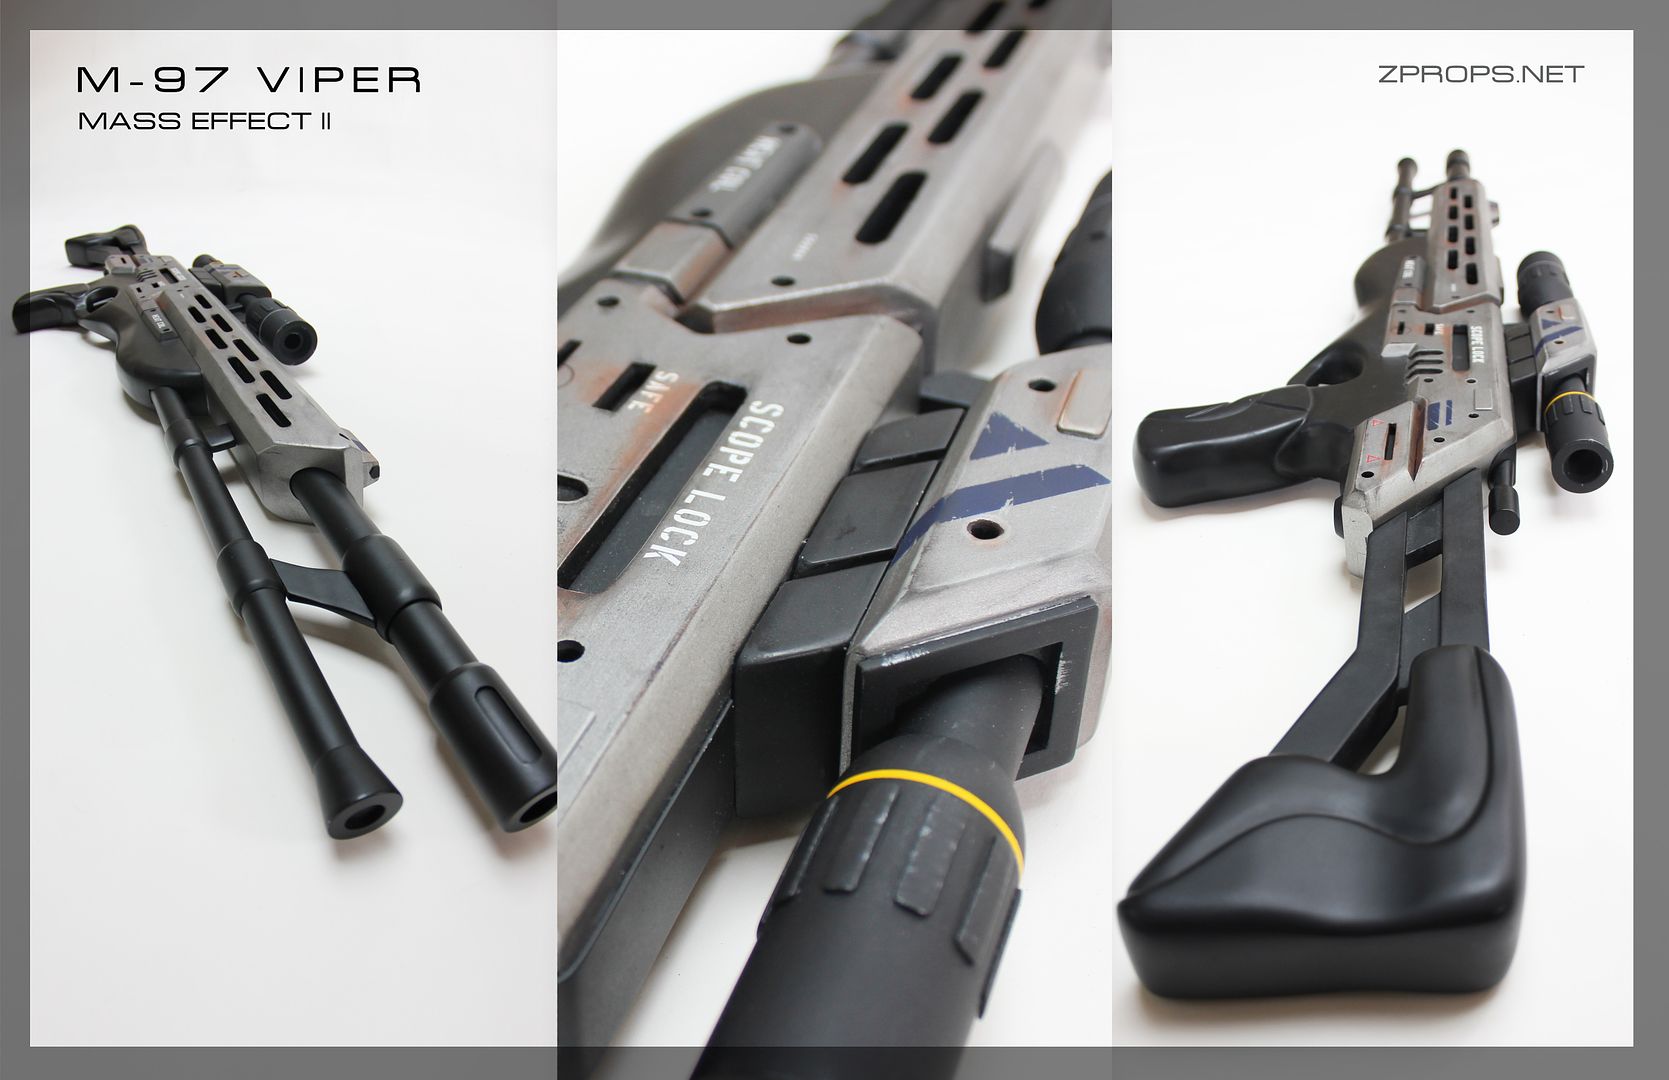
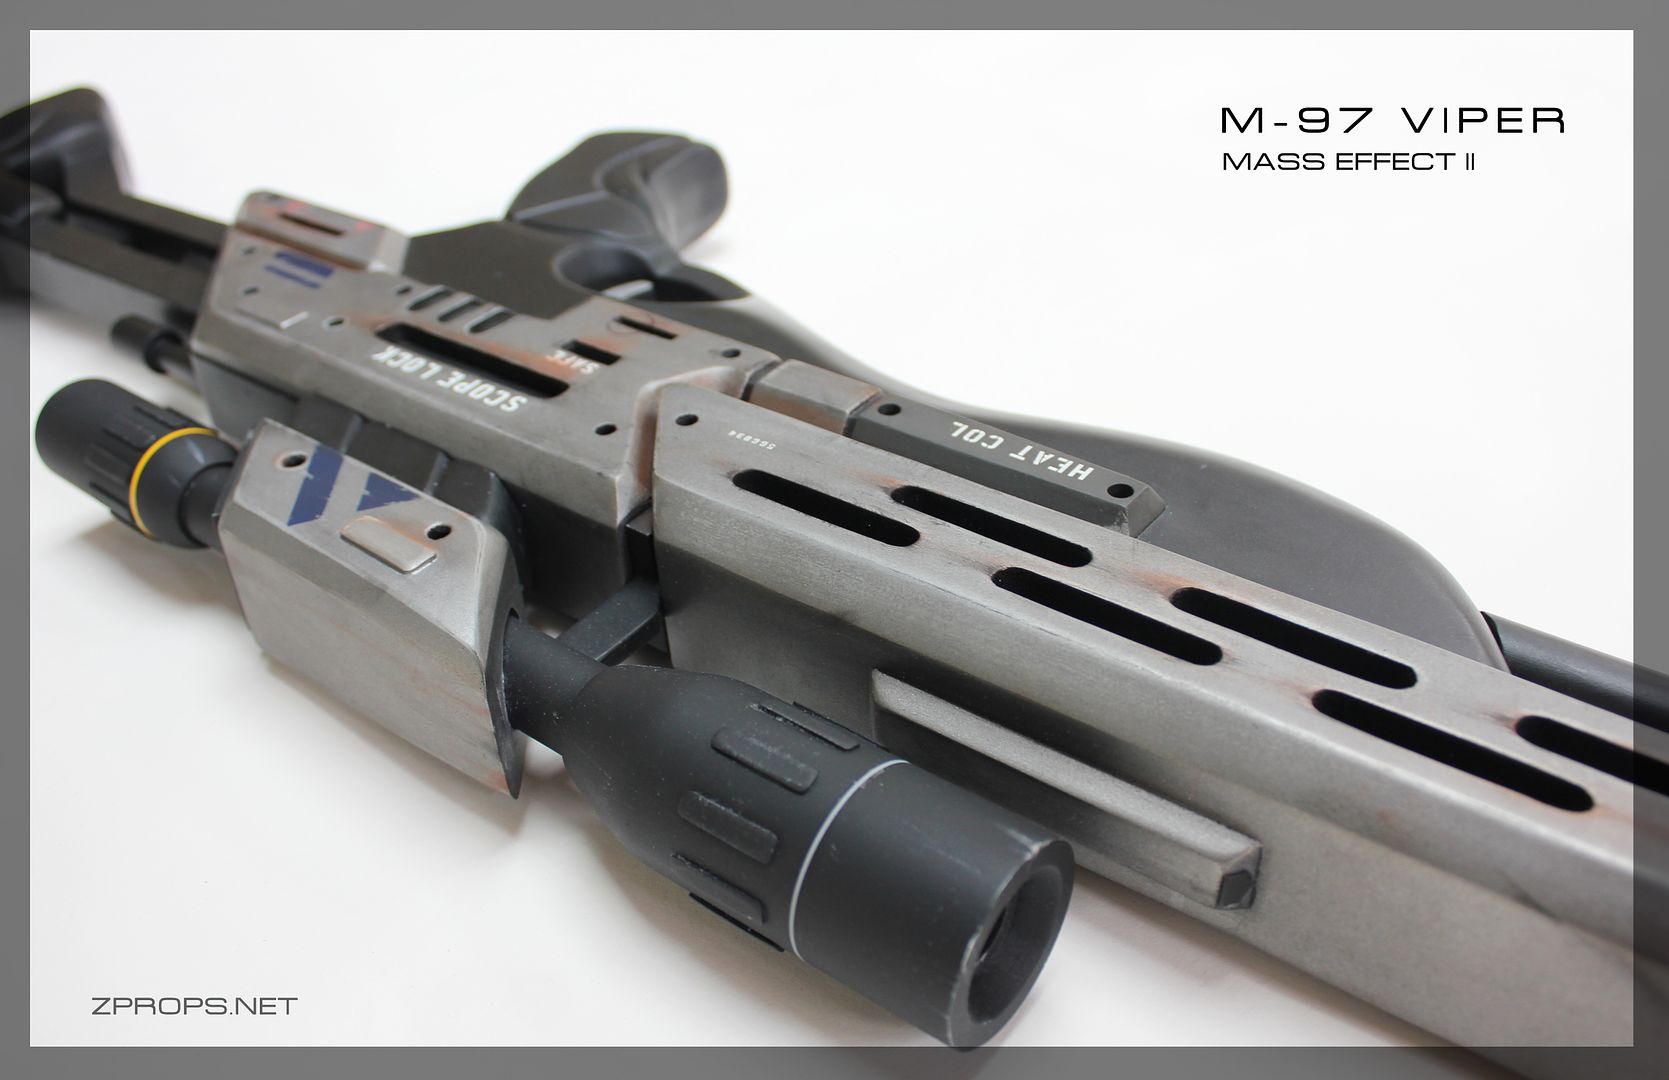
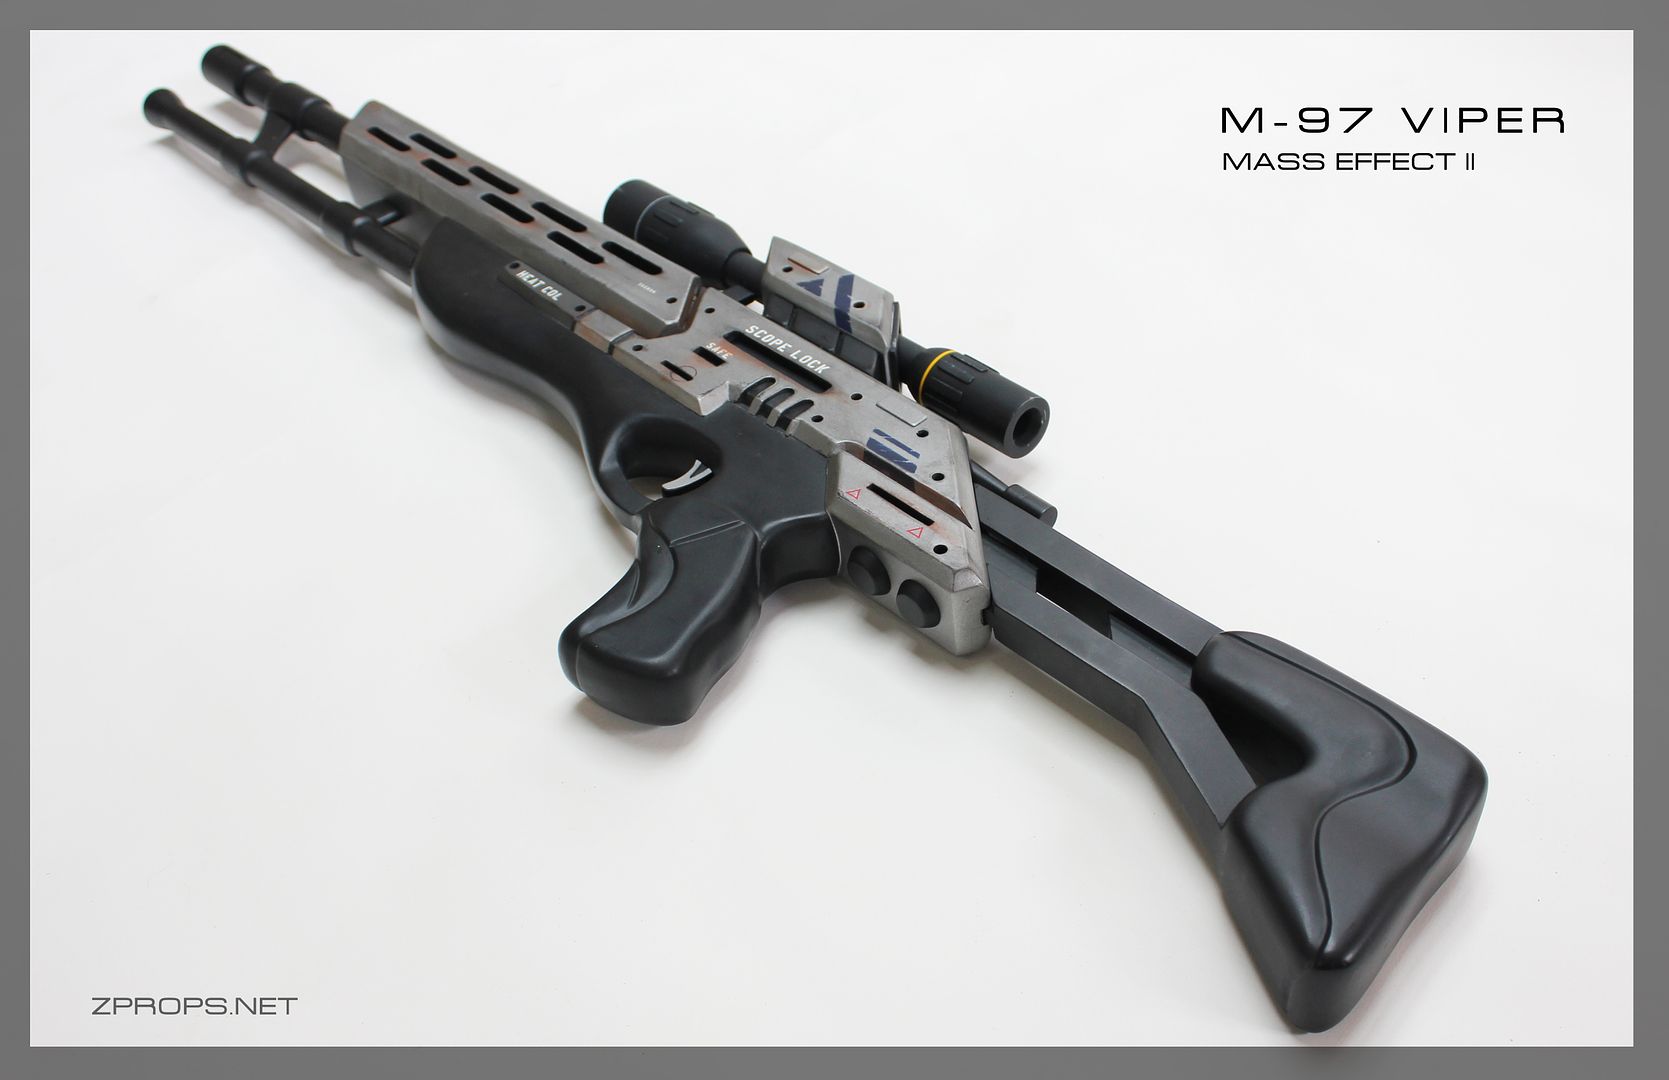
This build was certainly more simple than the other guns I've done. But I was still sure to capture all of the details, especially in the barrel assembly and receiver areas. I definitely didn't care for the gun design initially  but it grew on me. It follows the designs of the Mass Effect 1 guns to me.  I'm honestly surprised at what a huge fan base this gun has in the game.


I was building this at the same time I was building my first mattock, so I didn't take many pictures as I focused on the mattock.

Anyways, here we go!

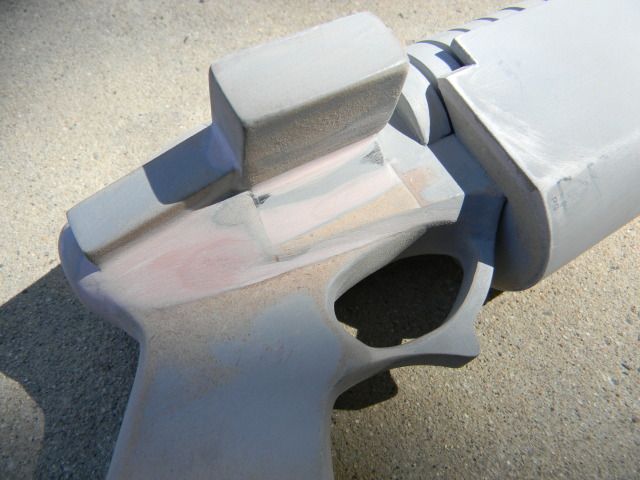
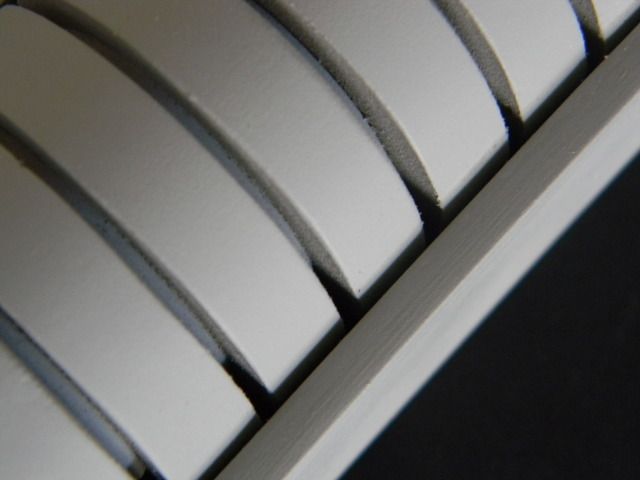
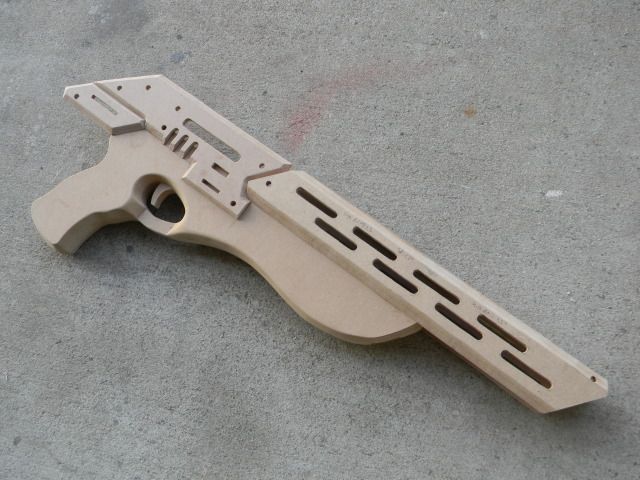
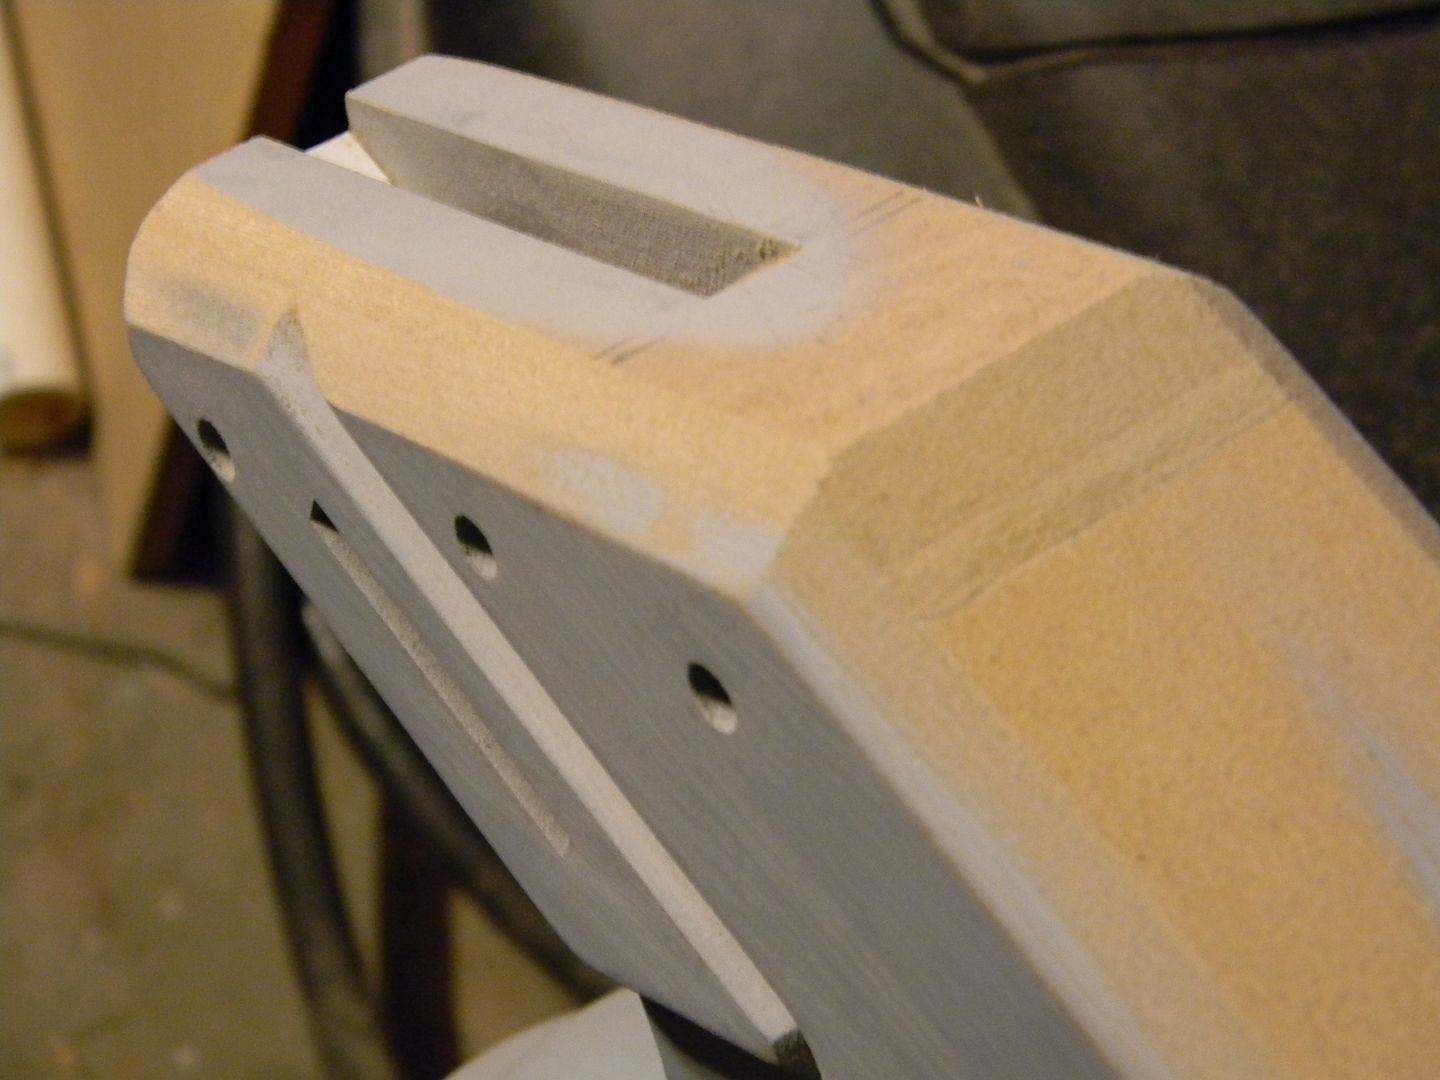
I started with the receiver details. I wanted to get these nice and crisp.


Then I did the little box details below that. Exciting stuff....


Little details on each side


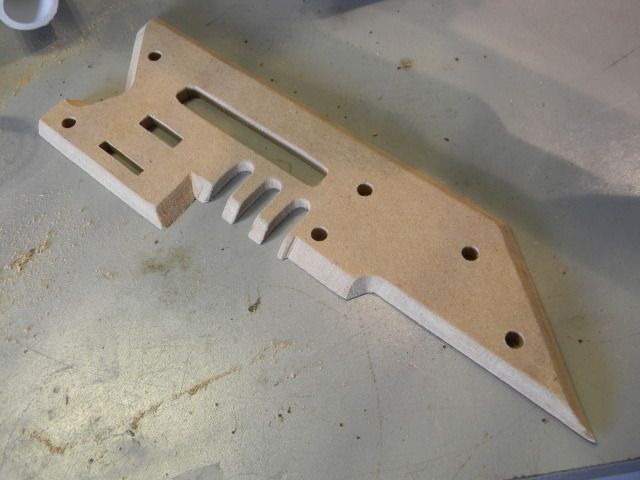
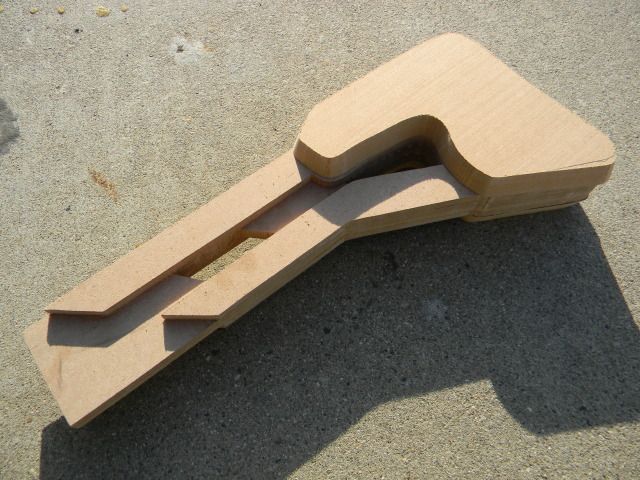
Then I did the rest of the "flat pieces" before laminating them together.


Scope riser. I've seen a couple builds where people skip this piece entirely!


Hollowed stock


Glued on shrouds, etc


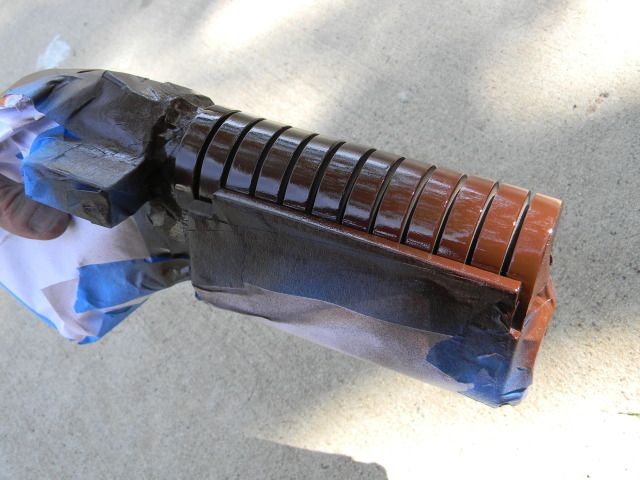
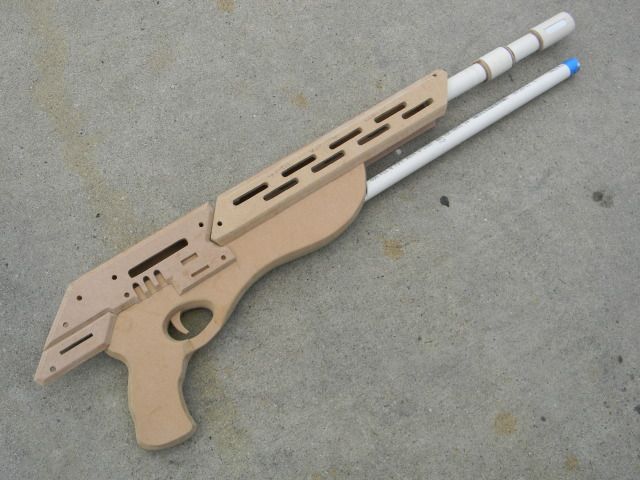
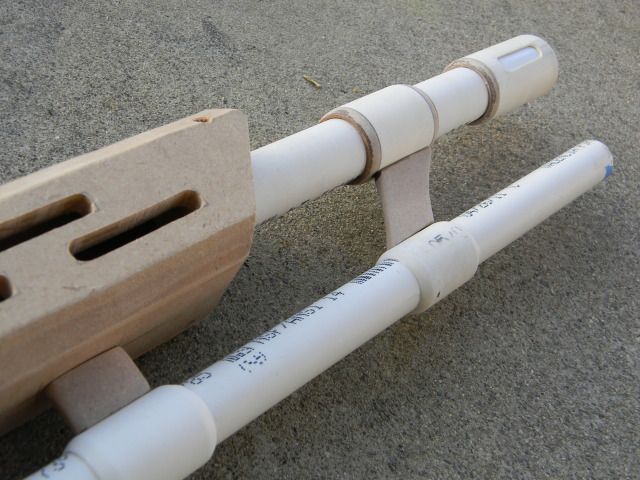
Started on the barrels. At this scale, the PVC worked out perfectly


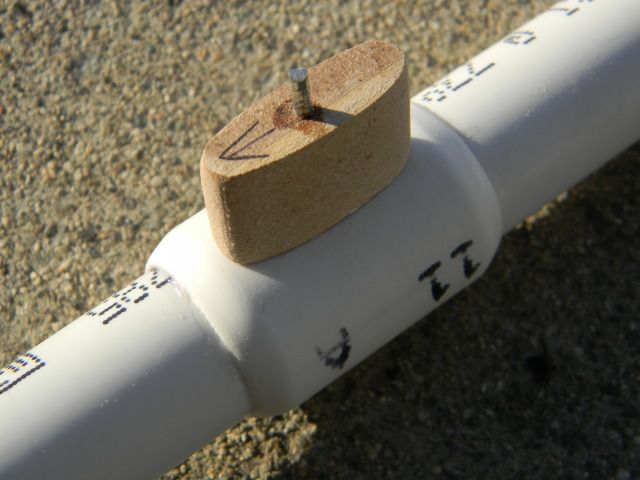
The barrel details are pinned for strength and are all friction fit for removal when painting


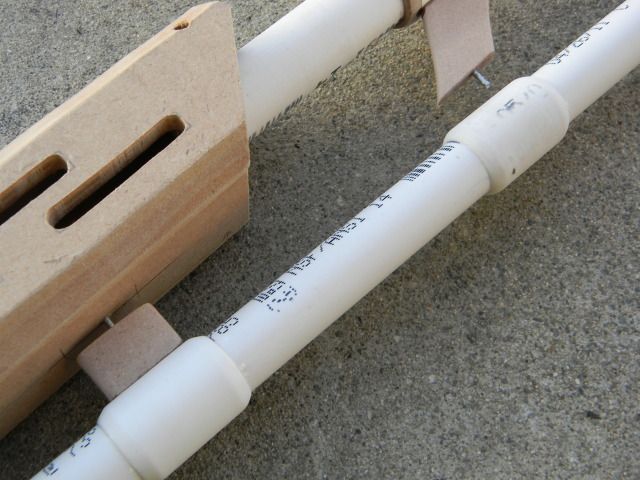
Barrel coming together


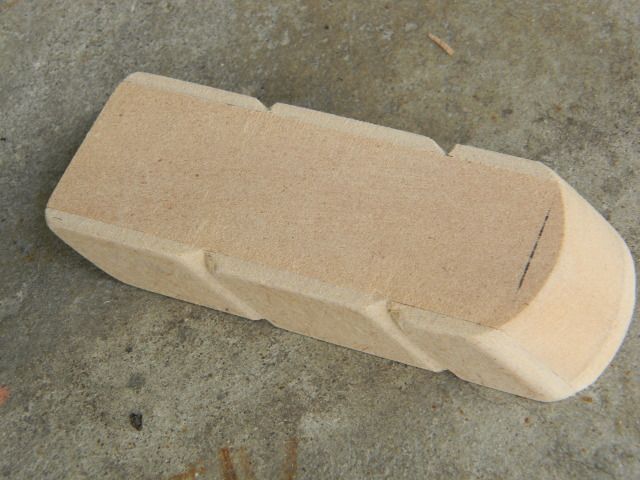
Blocking out the stock


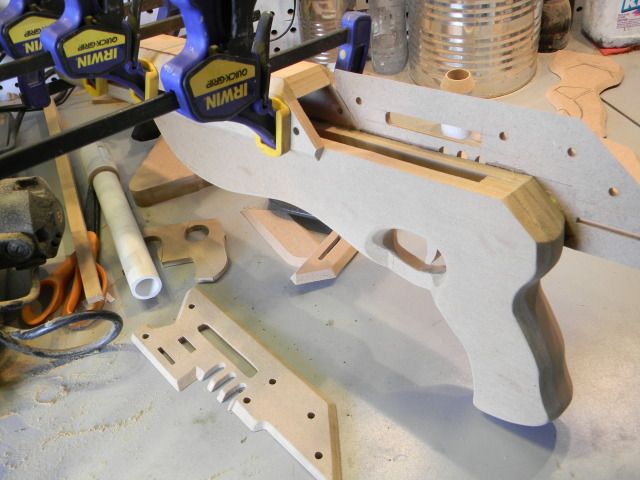
Early test fitting. Things get exciting here.


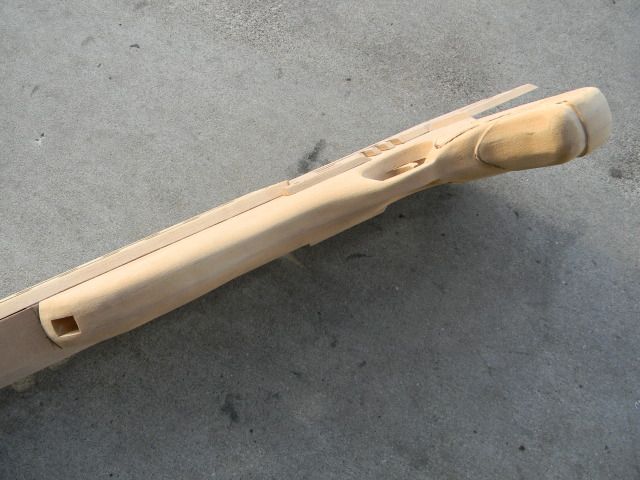
Stock roughed out and primed. Sanding this was great for my health.


Foregrip and trigger area sanded down. I used the rounded edge of a belt sander for this at my former school's shop.


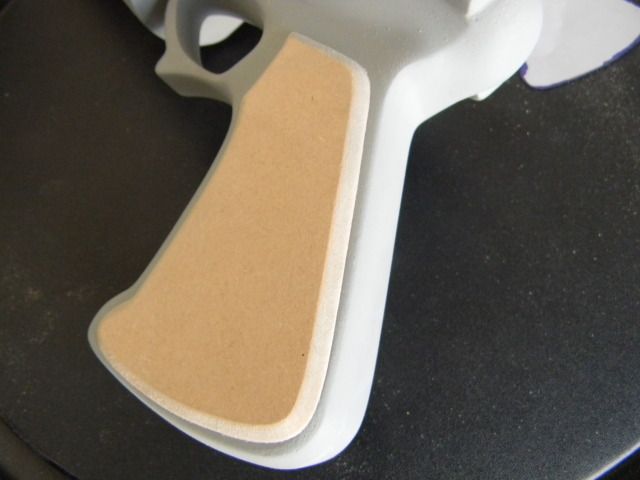
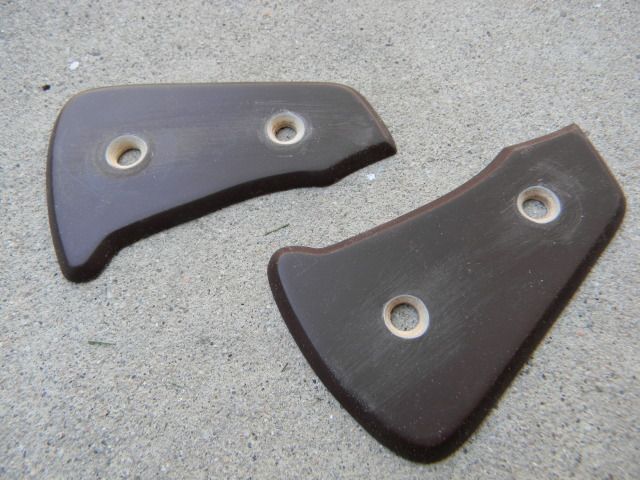
The grip details. In retrospect, I should have drawn "penispenispenis" all over this volpin style. This pattern is true to the reference. Don't blame me.


Some beveling. All done with a scroll saw, routers are lame! (I use a scroll saw for everything. Some have speculated that I shave with it, cuddle with it, mow the lawn with it, cut my sandwiches with it. all are true.)


I cant remember which end of the scope this is. They're both different though.


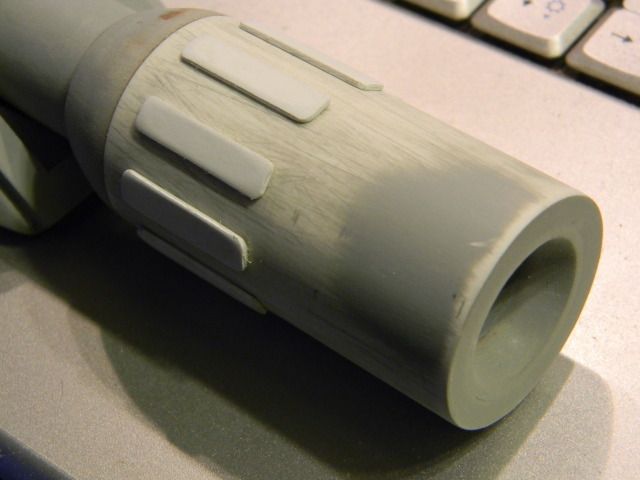
Annnnd the other end.


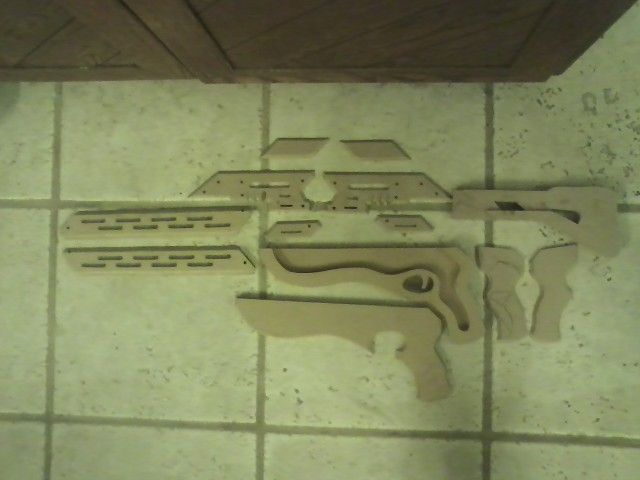
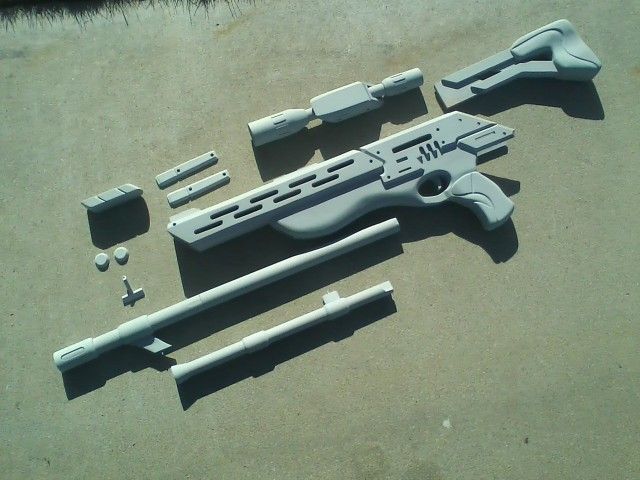
All the parts, sans the little "bolt" part above the stock.


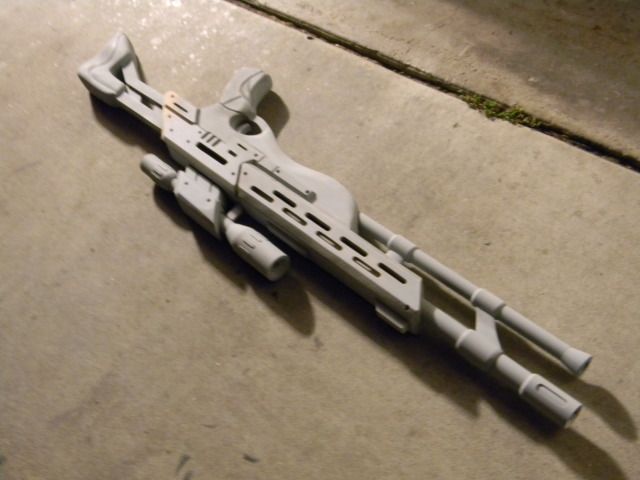
Primed up! (No easy feat with this much MDF)


My friend holding the gun with the basic "colors" mapped out. I got intimidated at this point and took a long break while I researched some good styles to weather silver. A lot of people recommend the acrylic wash and wipe, But I went with a completely different method. Hopefully you think it looks just as good.


(This is not me people.)

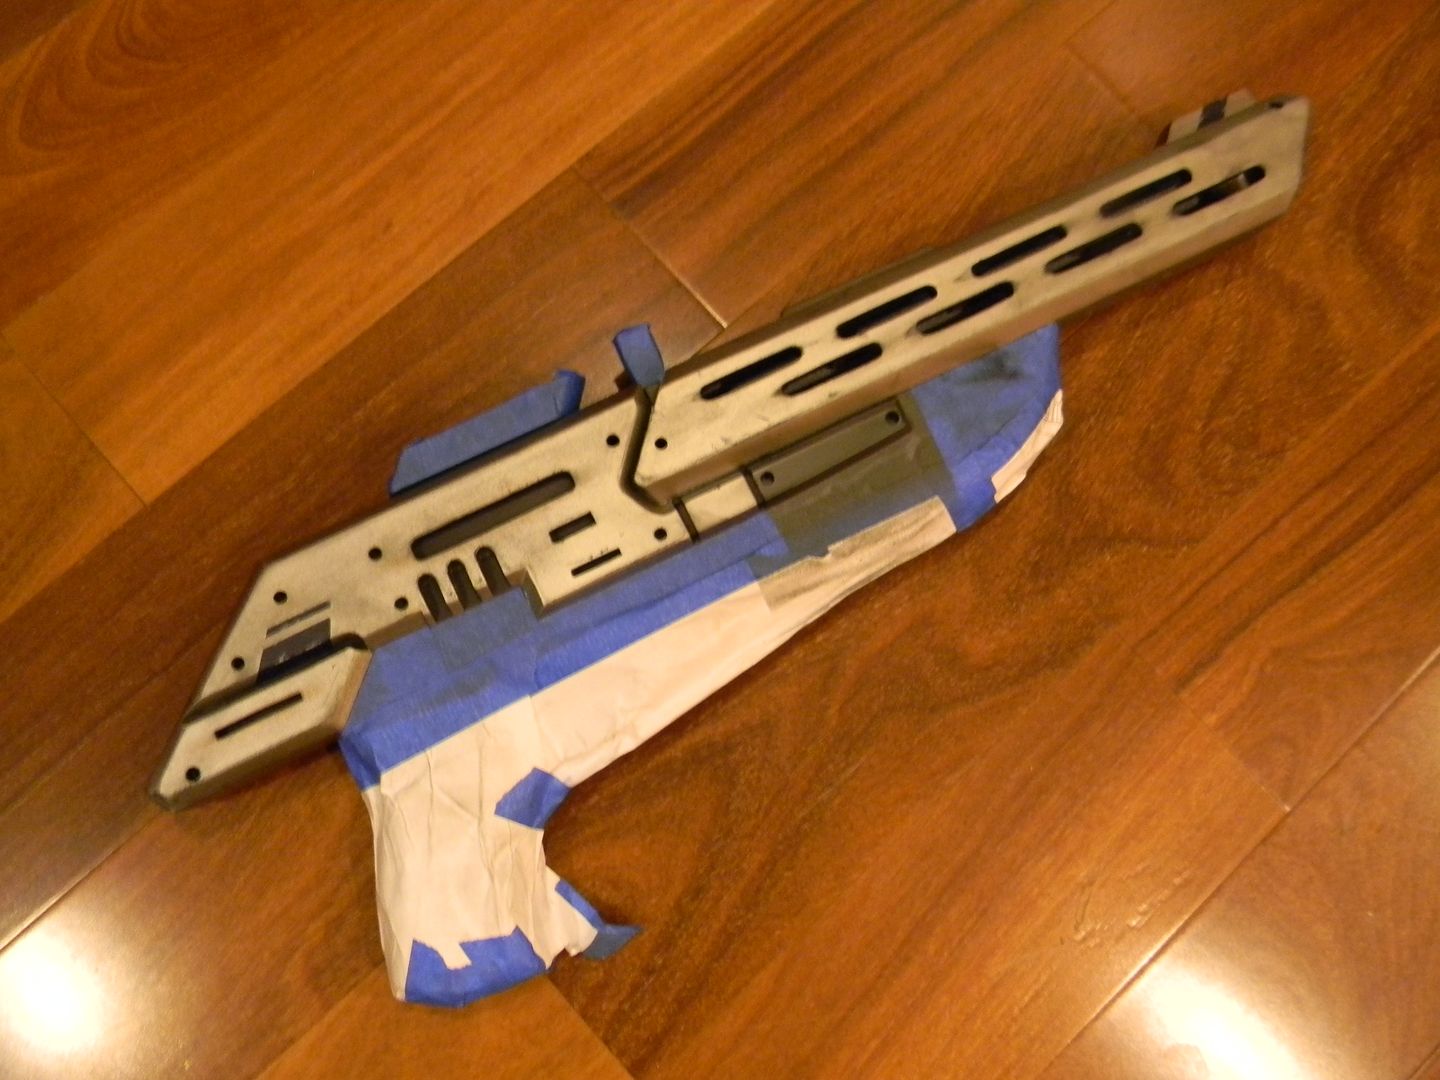
I taped up the black portions because I was smothering the silver areas in dullcote which I didn't want to get on the matte black. (there's a difference between flat, matte, and satin. )


This piece would have been a bit difficult, so I didnt use a scroll saw for it. For those wondering, its the "bolt" end. Charging handle. I'm not sure what its supposed to be really. The important thing is that we here at Zprops are equipped with the finest machines. Here is a picture using my wood lathe/sanding block.


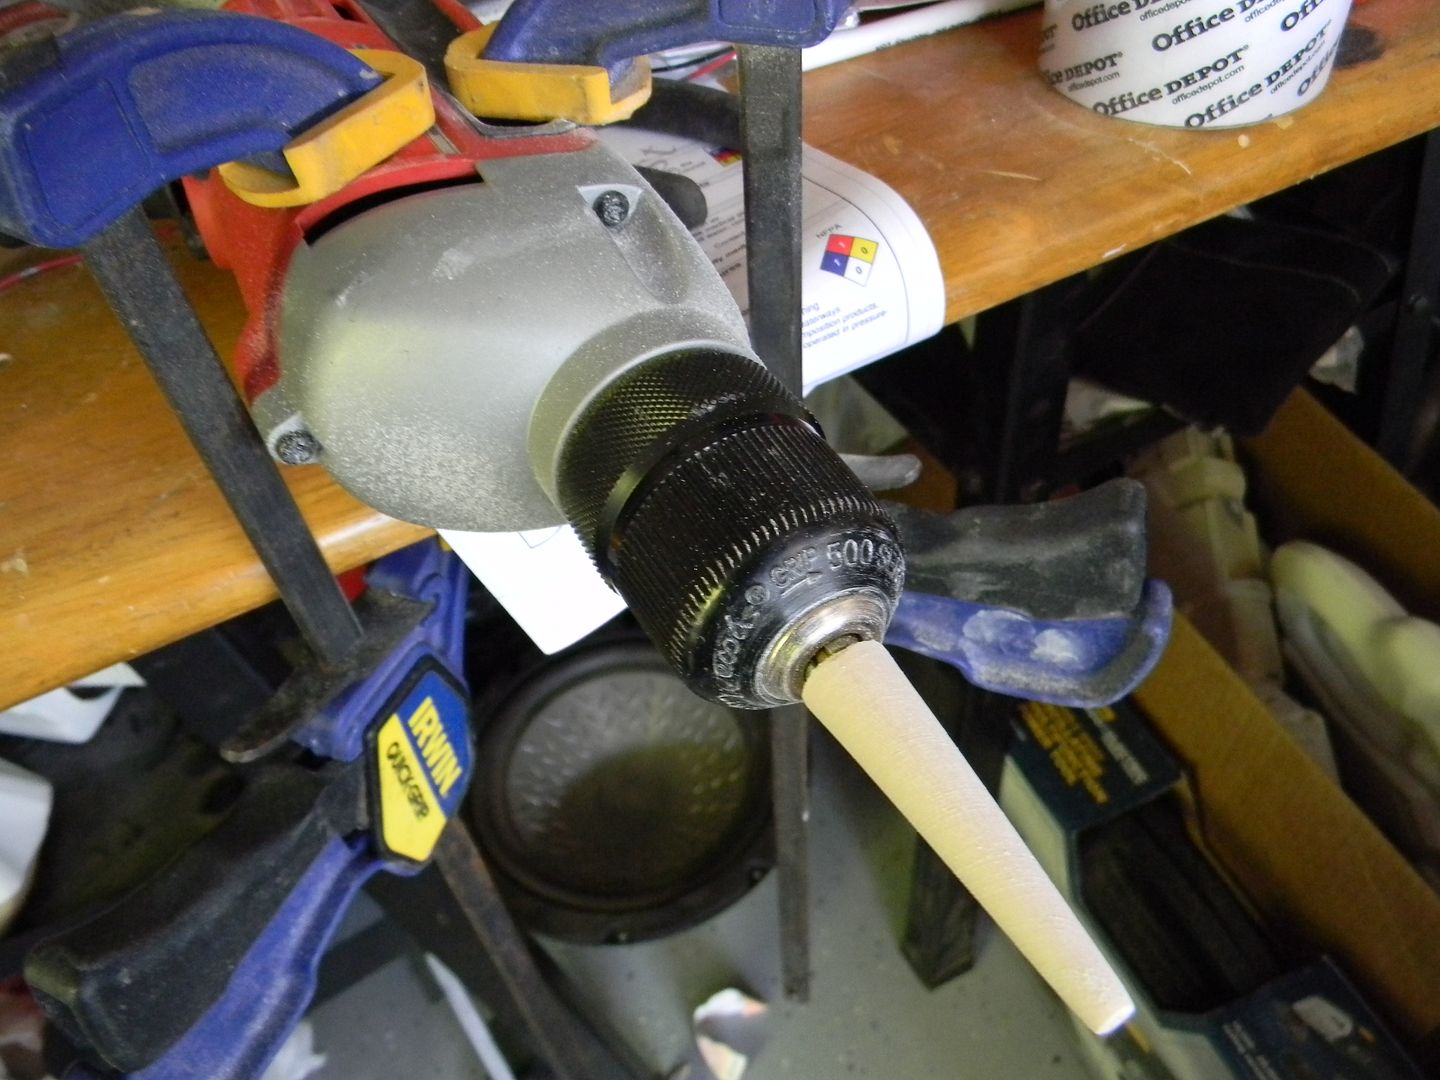
#Cclamps #ghetto #wiredoncoffeetogetitdone

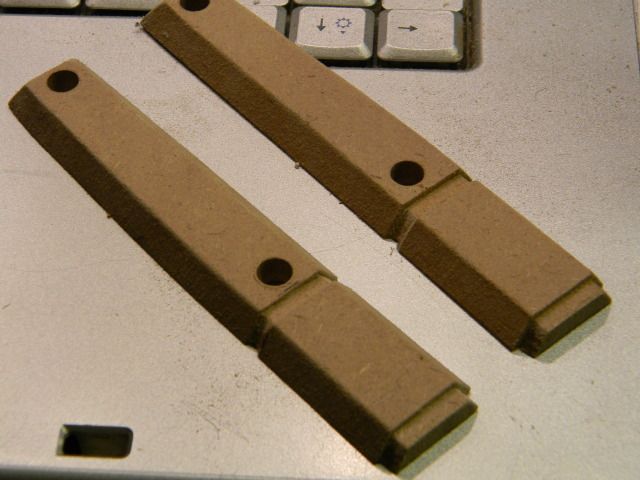
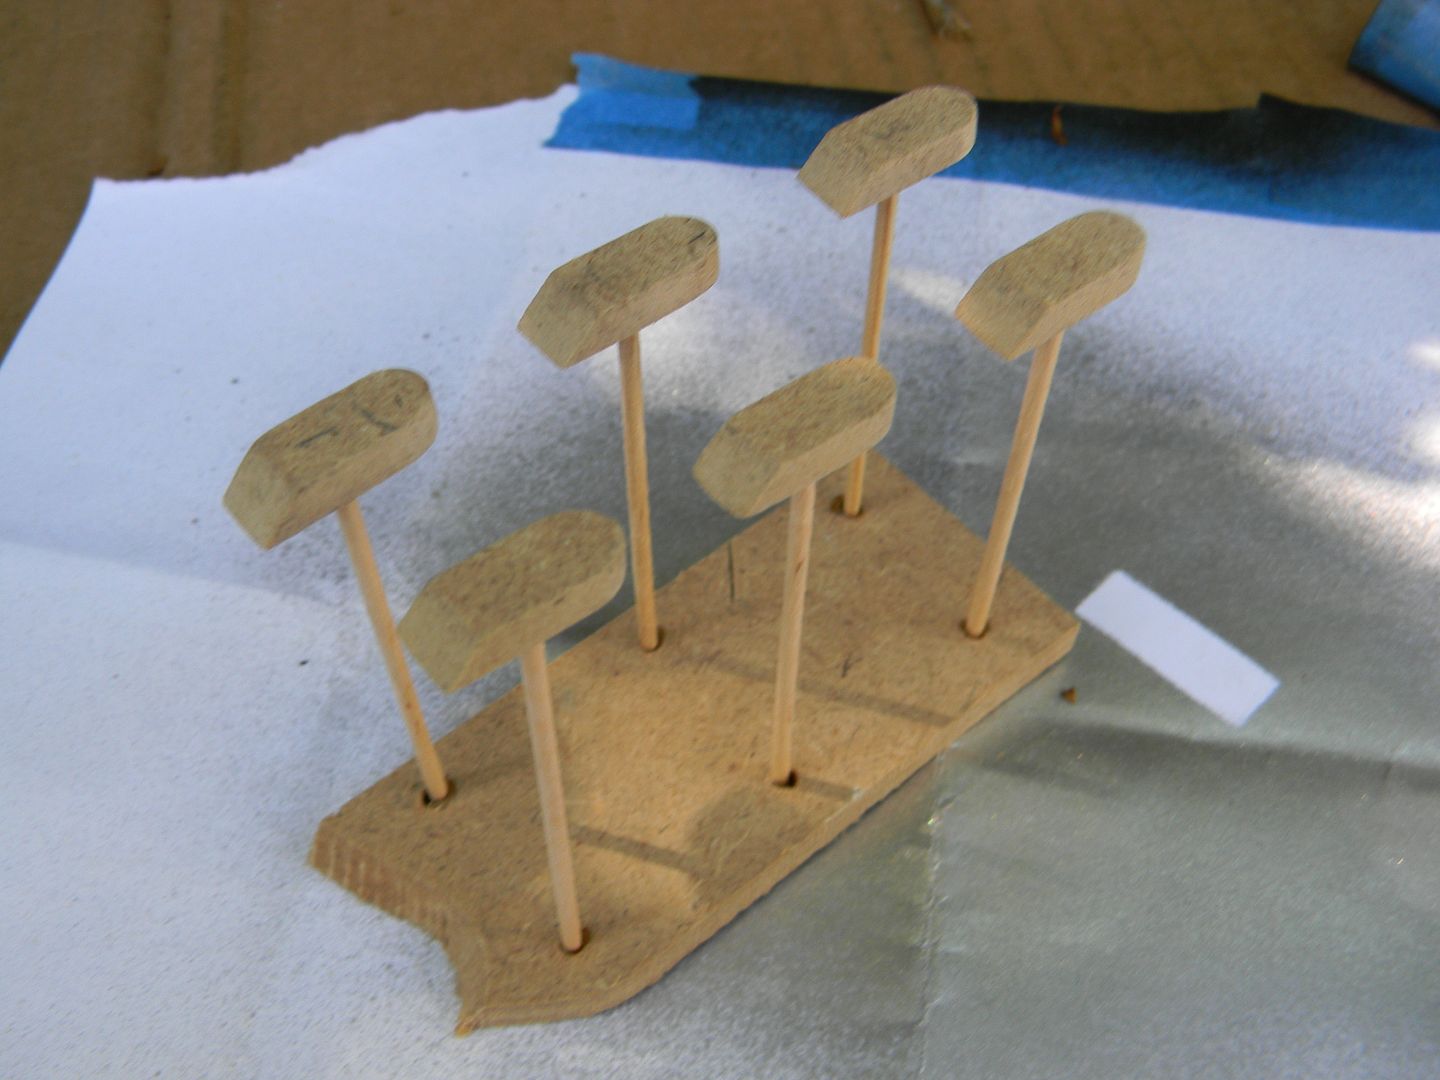
Tedious little inserts that fit into the receiver slots. they all had different width/curvature and had to be dremeled and numbered to fit. If I didn't mount them like this they would have blown all over the place from the spray can.


First time using a high end camera! It was nice.


For updates before write ups get posted here: Ermagherd. Furrsebook purrge.

Monday, August 13, 2012

Gundam Assault Carrier Spacecraft


So, like, a long time ago (well it seems that way to me. hmph.) I went to college and majored in industrial design. I really wanted (still do) to be a toy designer or to be somehow connected to the collectibles market.

As you can imagine, I got pretty bored of the housewares and more mainstream stuff we were instructed to design there. So, for my graduation project (a two quarter project where we get to pick a design category and direction that we want) I chose to do something inspired by one of my favorite companies, Bandai.

The project was from start to finish: design goal > research > ideation > refinements > control drawings > presentation/final model.

This was long before I knew I would be doing props after college (or blogging about them at all) so I have no pictures as far as the "prop" itself goes. Speaking of which, I consider this to be a prop so here it is. Deal with it!

It was designed to go with Bandai's Gundam action figure/model kit line, as well as compliment other sets in the same line.


First things that popped into my head. 

I really like the middle right one on page 3 but it would have been a bitch an a half to make a model of. 

Some refinements and new aggressive shapes.

Chosen design direction


These are the features I wanted. I think it translated pretty well into the model, although I never finished those little magnetic bridges.

She sure do look purdy.


Slots and keys hold this together, as well as a bunch of tiny rare earth magnets. The production version would obviously utilize tabs.


This is the "cityscape" arrangement of the parts. Had I finished the bridges and made a few more of these, I could have had the ultimate geekfest. 


Deets


Tuesday, August 7, 2012

Kyle Katarn's Bryar Pistol V2


I was approached by (More like barraged by!) someone on the cosplay forums to make this for them.

He provided This as a reference:


Some of you may remember way back when I made this. It was the first prop gun I ever made (If you don't count the sentry) It looks very similar to this one as they are supposed to be the same thing. but there are many conflicting sources on how this piece looks, and those sources themselves are scarce. Fans like Koda Vonnor and Arkos have had to fill in the blanks. This version is the Arkos version.

I very rarely build the same things twice, but since this doesn't share a single part with the first one, I decided to give it a go.


Bare with me here. Most of my pictures for this build were taken on my cell phone. My cell phone isn't with us here today thanks to.... "neurological issues".

Luckily I snapped this picture in its raw material build up before primer. That should tell half of the story. The other half of the story is cutting out all fo those #@%$^@^ circle vent things and the spacers that go between them, all by hand. (I don't believe in the laser cutter yet have access to several)

Styrene, MDF, tubing. nothing new here.


Last time, the tip was made completely out of styrene. This time I cut out the tip and notches in MDF, then laminated both surfaces in styrene.


To get the organic lines above the grip, I called up my friend Bondo.


The reference didnt have grips, just a checker pattern on the handle. I added these because they would compliment the brown on the top of the gun.


Primed up


By alternating styrene and MDF circles laminated together, I would get much more precision than using a lathe for the top "heat sink" (Wasn't fun to sand though!)


Did the basecoat in black, then espresso brown for the top and grips.


Oops. Forgot about those countersunk screws...


One more for the books.


Till next time!

Facebook Page