Delivering the inevitable. One photo at a time.
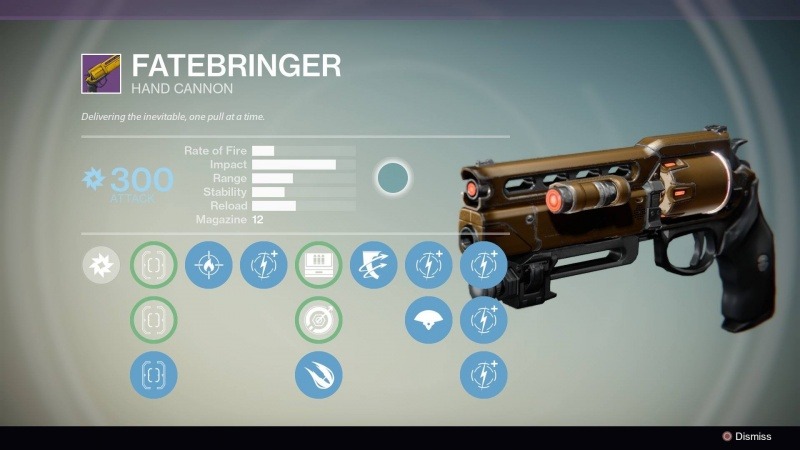
One of the main reasons I chose the standard hand cannon as my first destiny piece was so I could make this down the line:
One of the main reasons I chose the standard hand cannon as my first destiny piece was so I could make this down the line:
With most of the work done, all I had to do is make the accessories, the new sight, and alternate cylinder. This went pretty quick and there's not much to show. The paint job took almost as long as making the parts. It still took some time, and its a good thing House of Wolves came out to refresh some of the specs of older legendarys like this one in game.
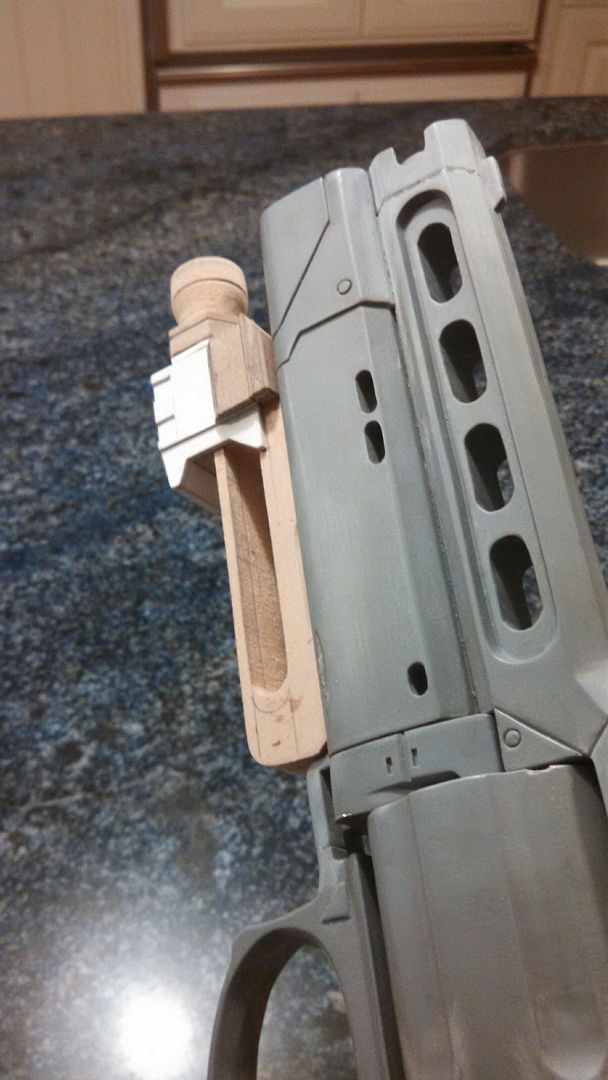
More MDF. I used styrene as a substitute for thinner pieces that couldn't be sourced in MDF.
This piece was not turned, each semi-circle was cut out by hand on a scroll saw and glued in perpendicular to the base.
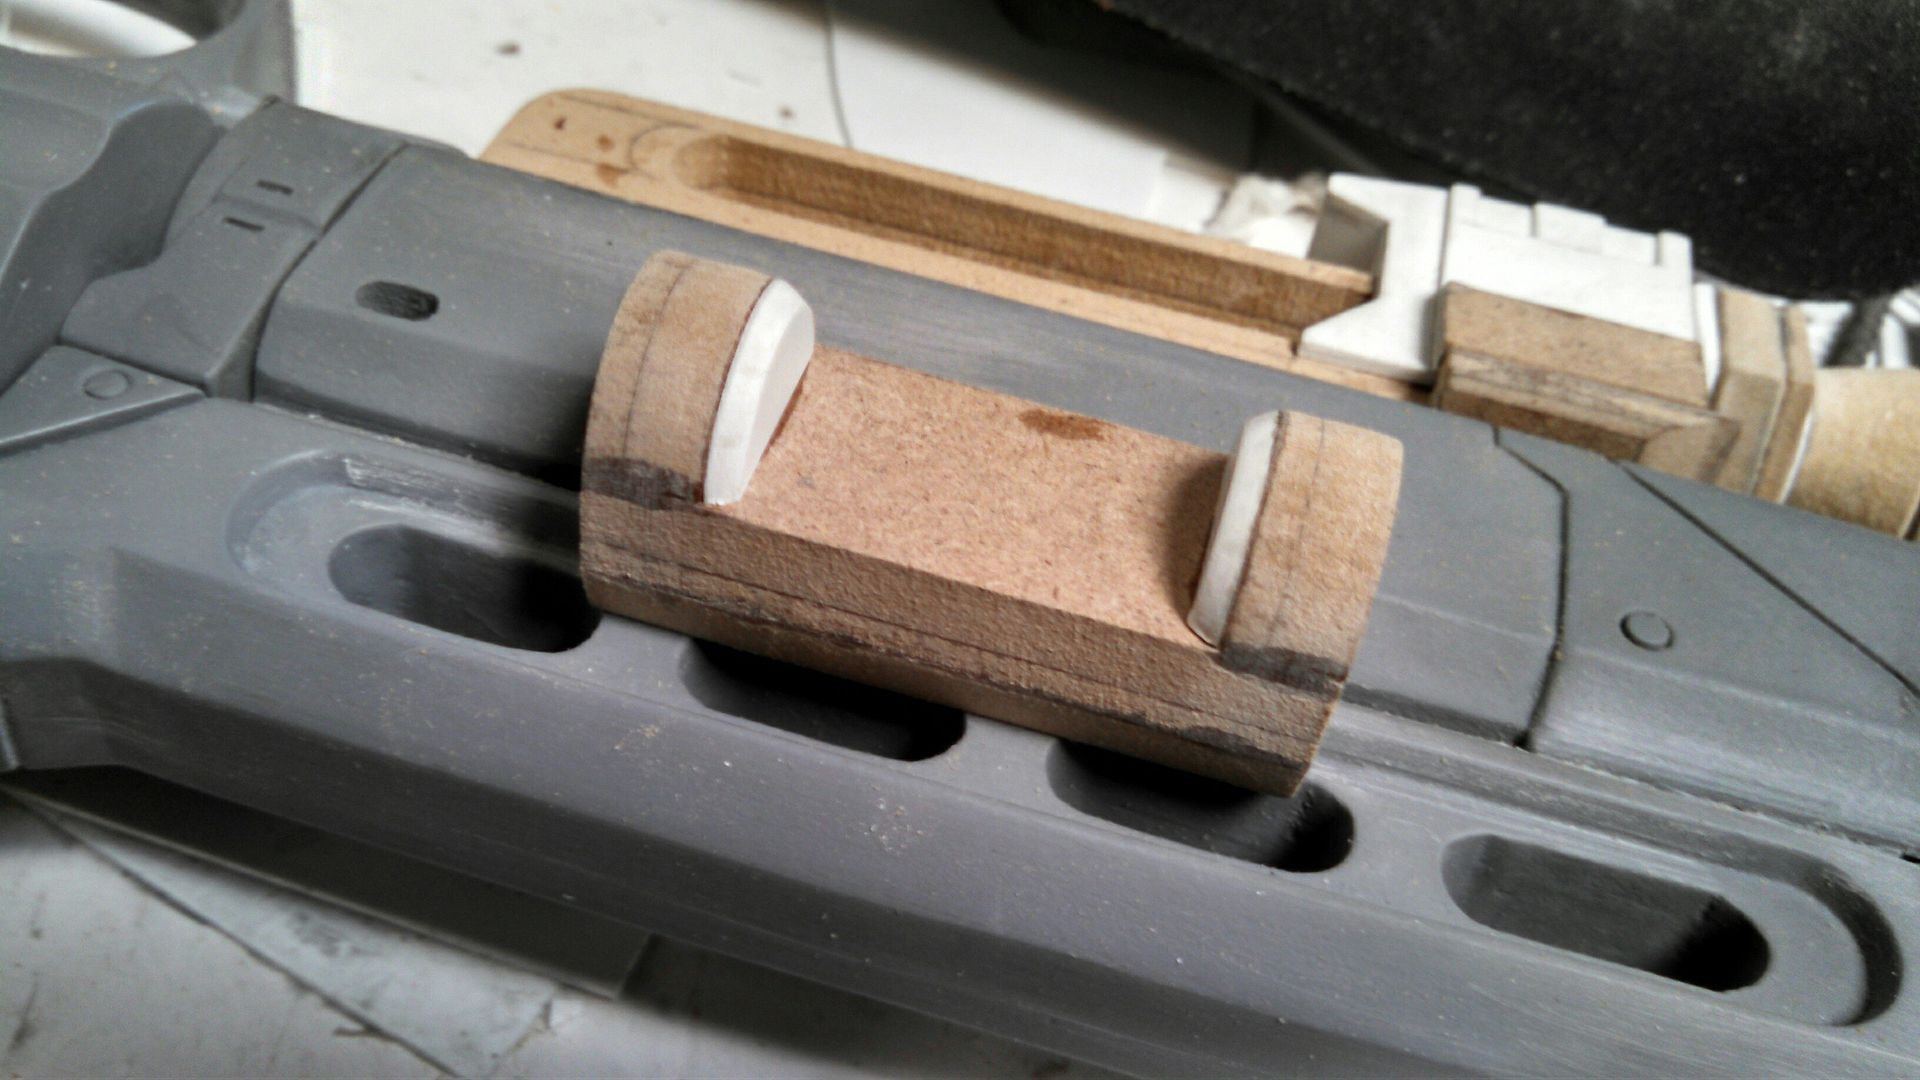
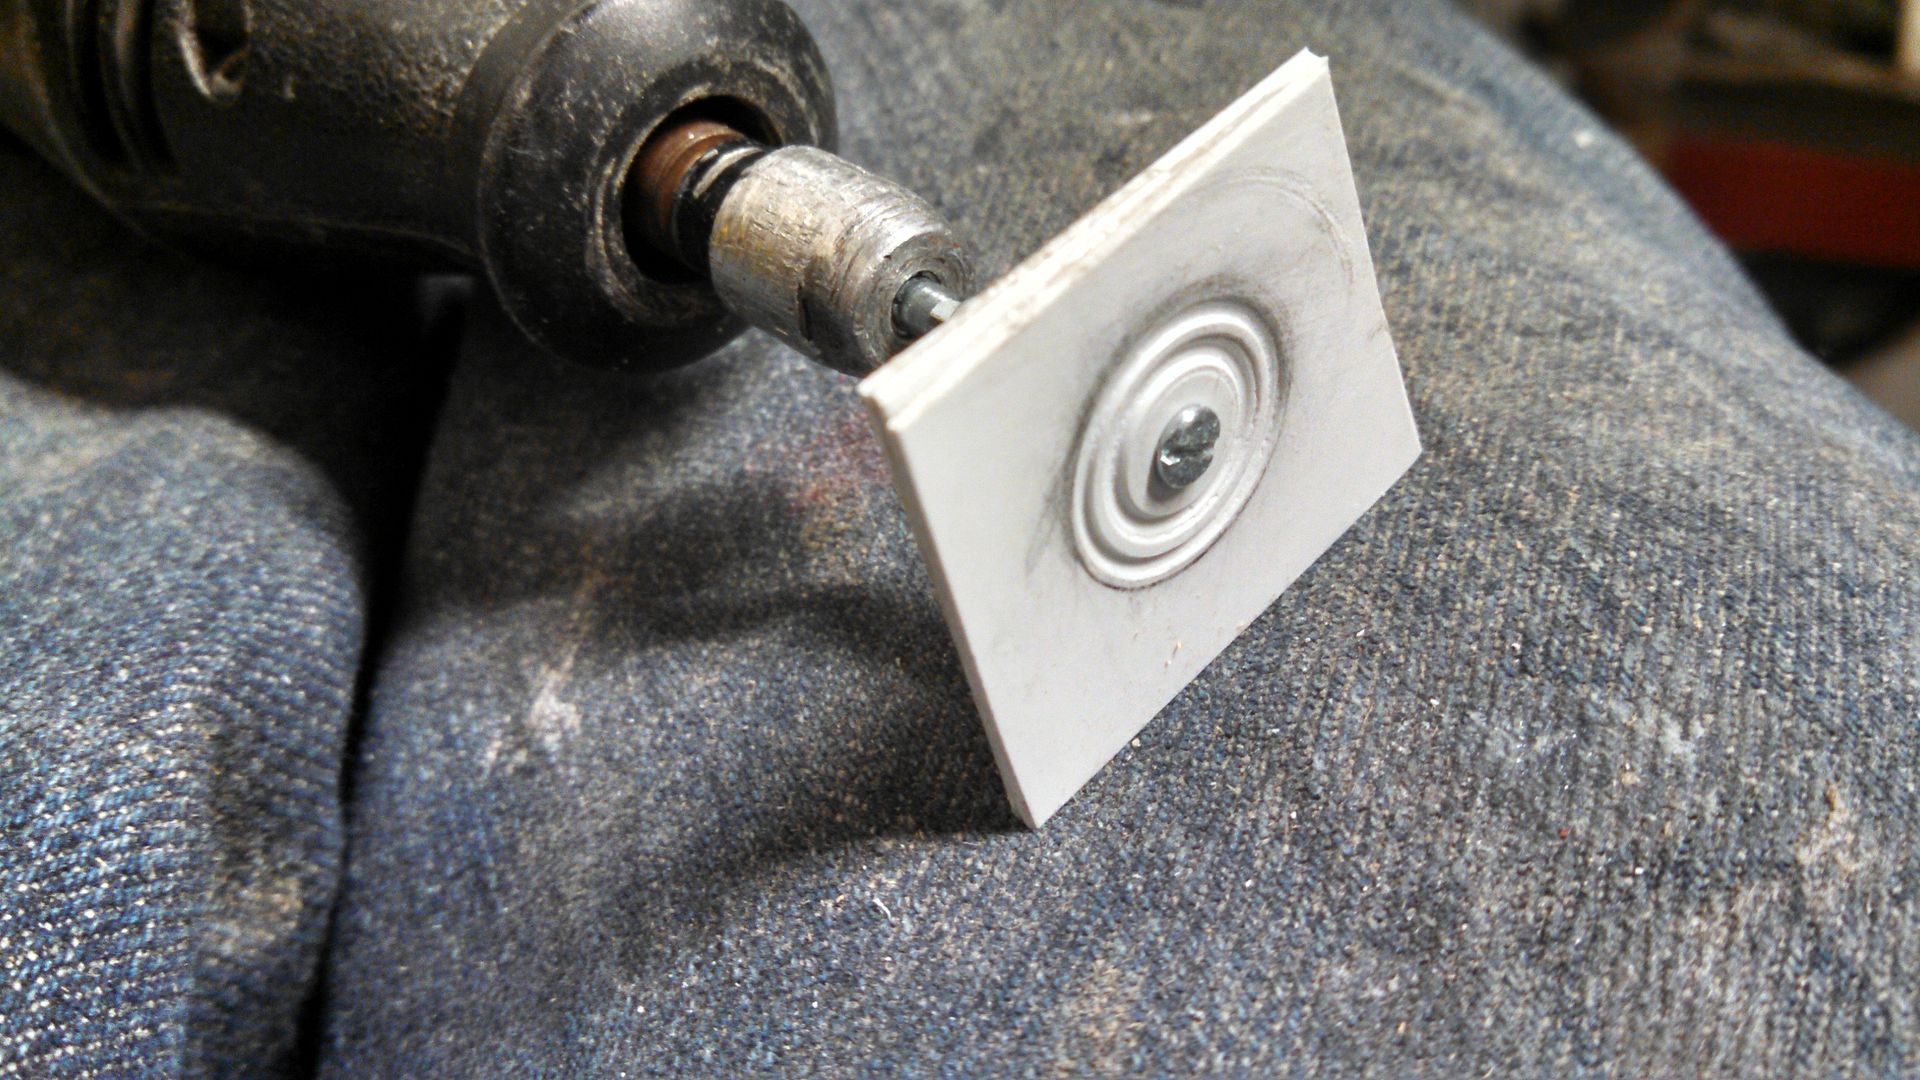
The grooves on the face were made my attaching some pieces of styrene to my dremel and shaping them with an exacto while it spun.
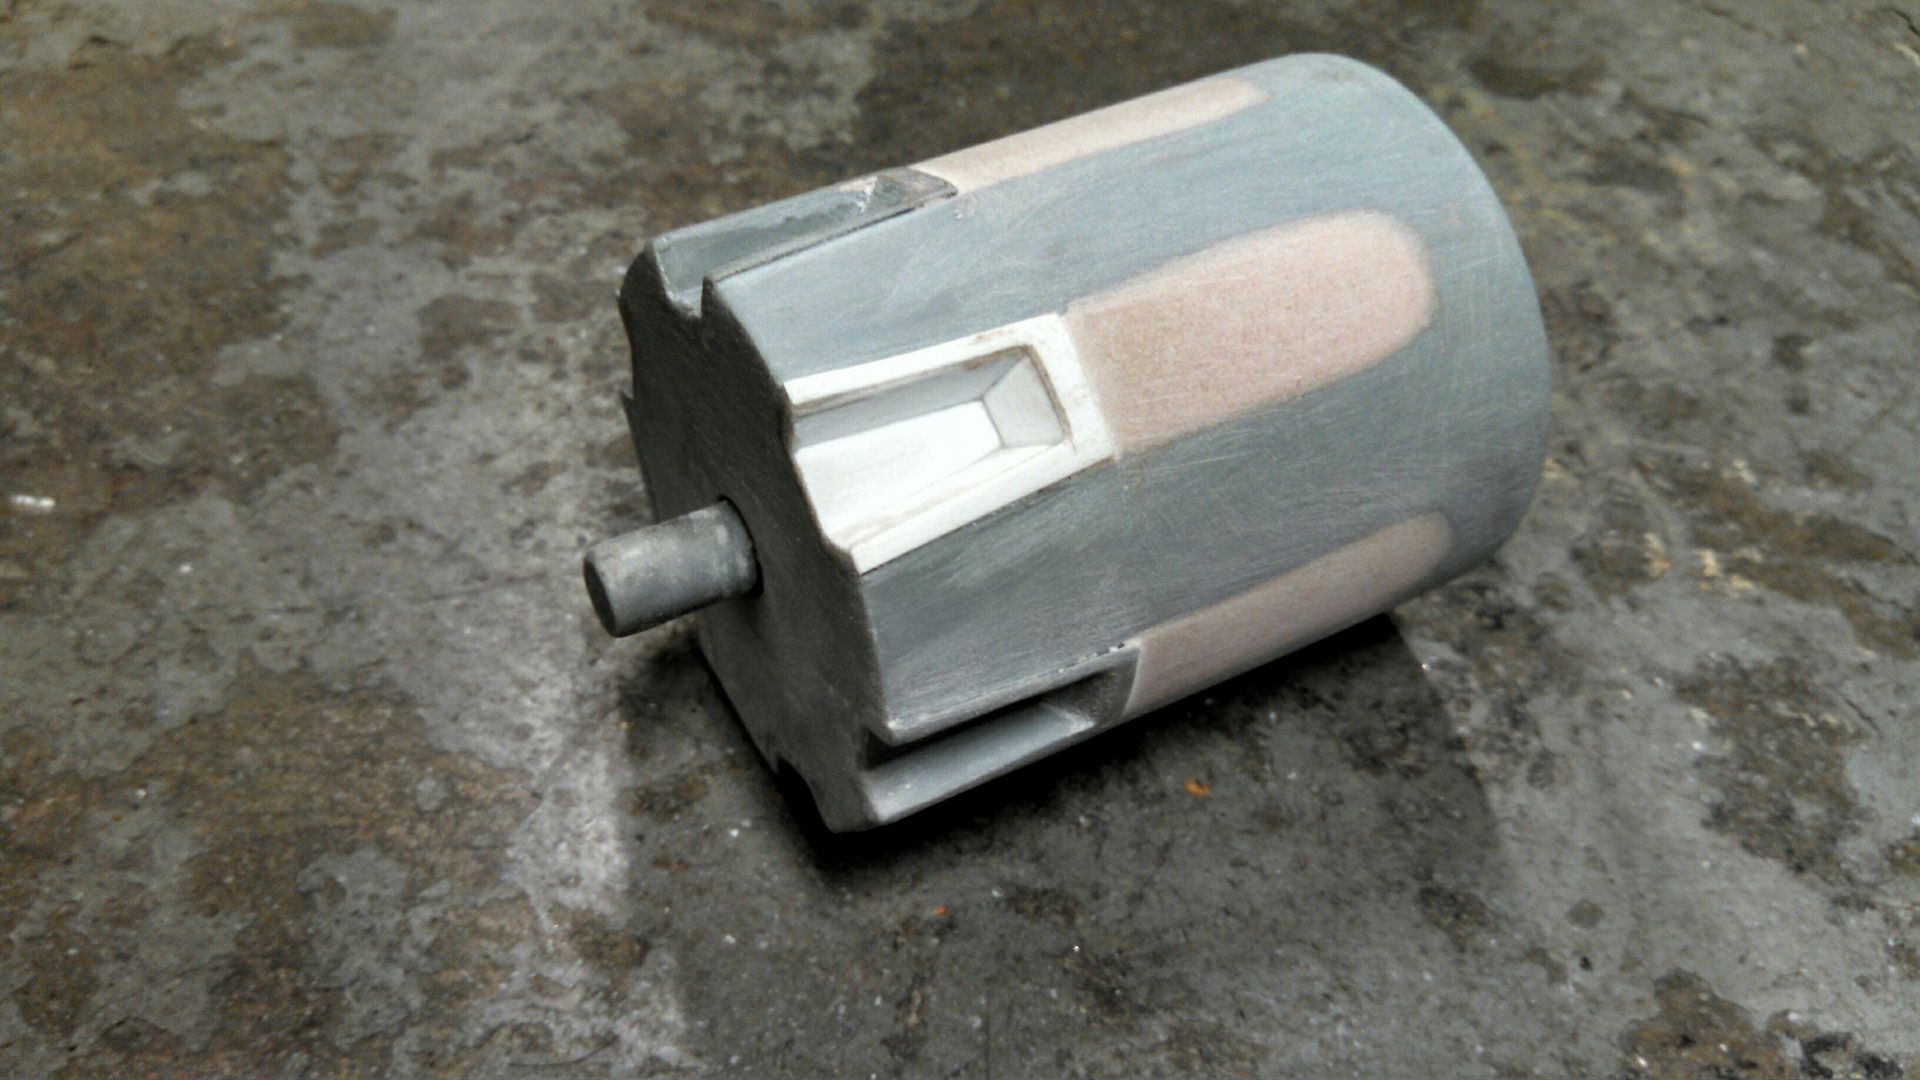
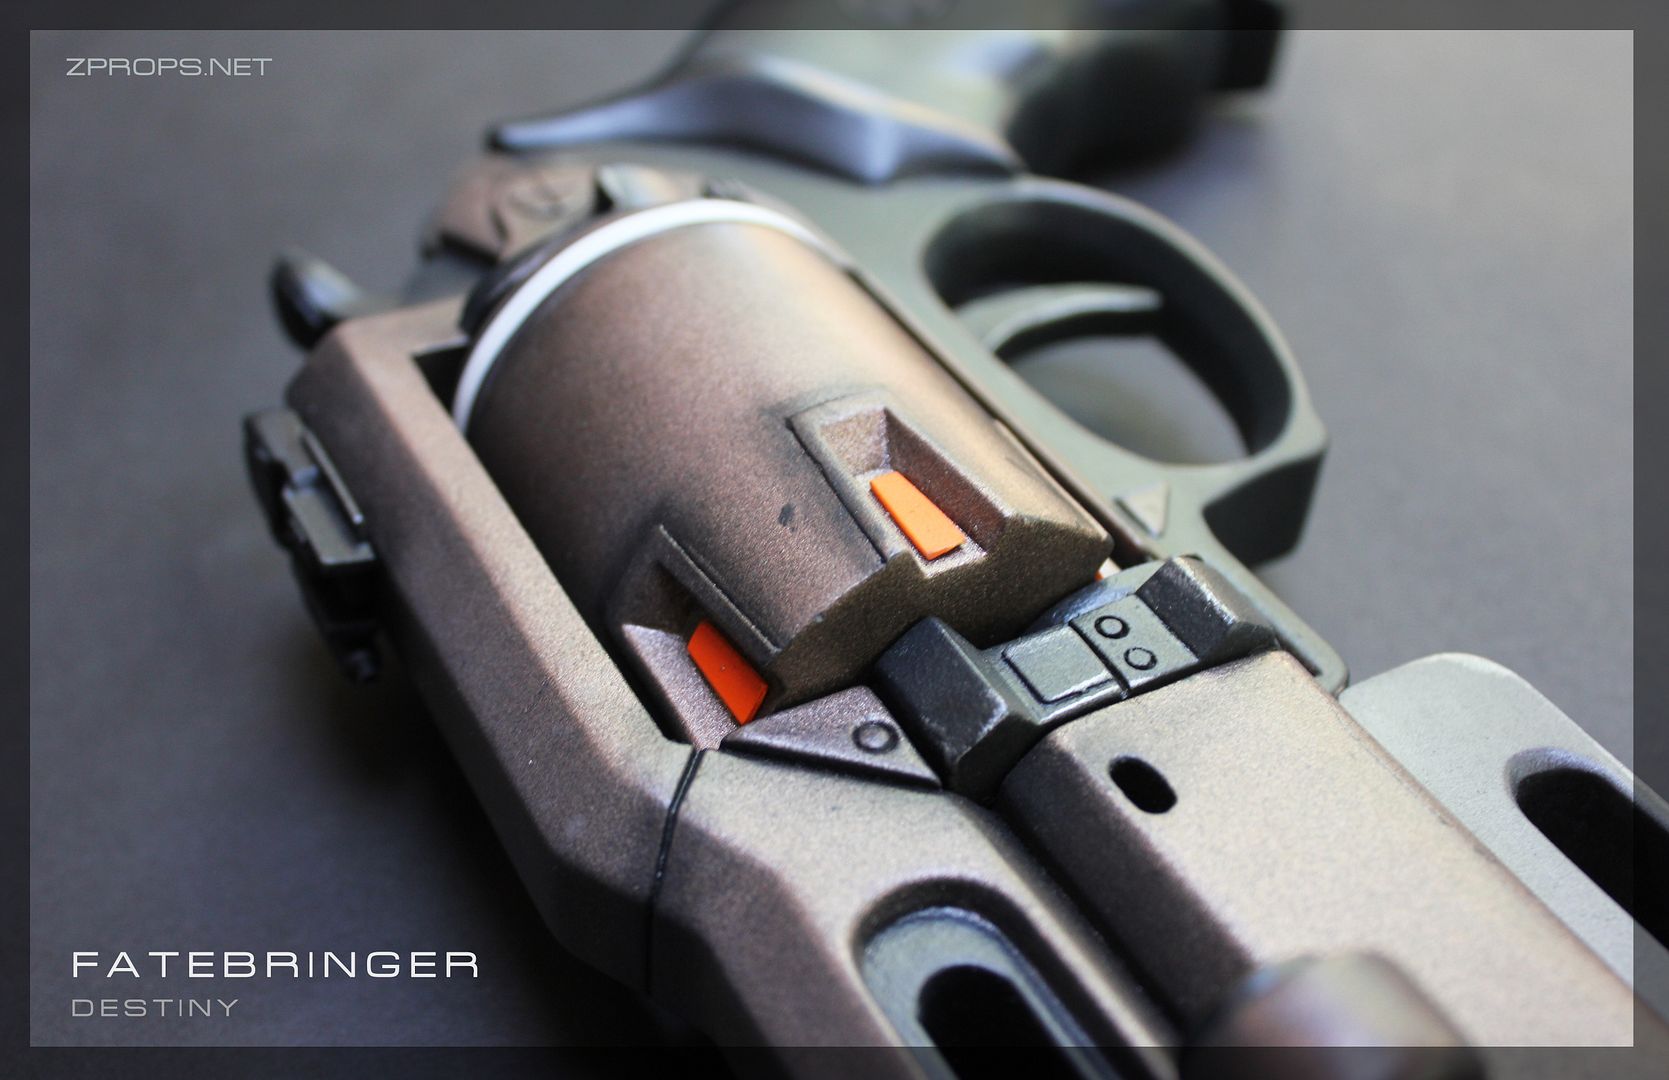
The beveled insert for the cylinder was scratch built out of really thin styrene. I gouged out a recess for it in one of the grooves and did a test fit. Happy with the look, I made a simple open faced mold and cast 5 copies.
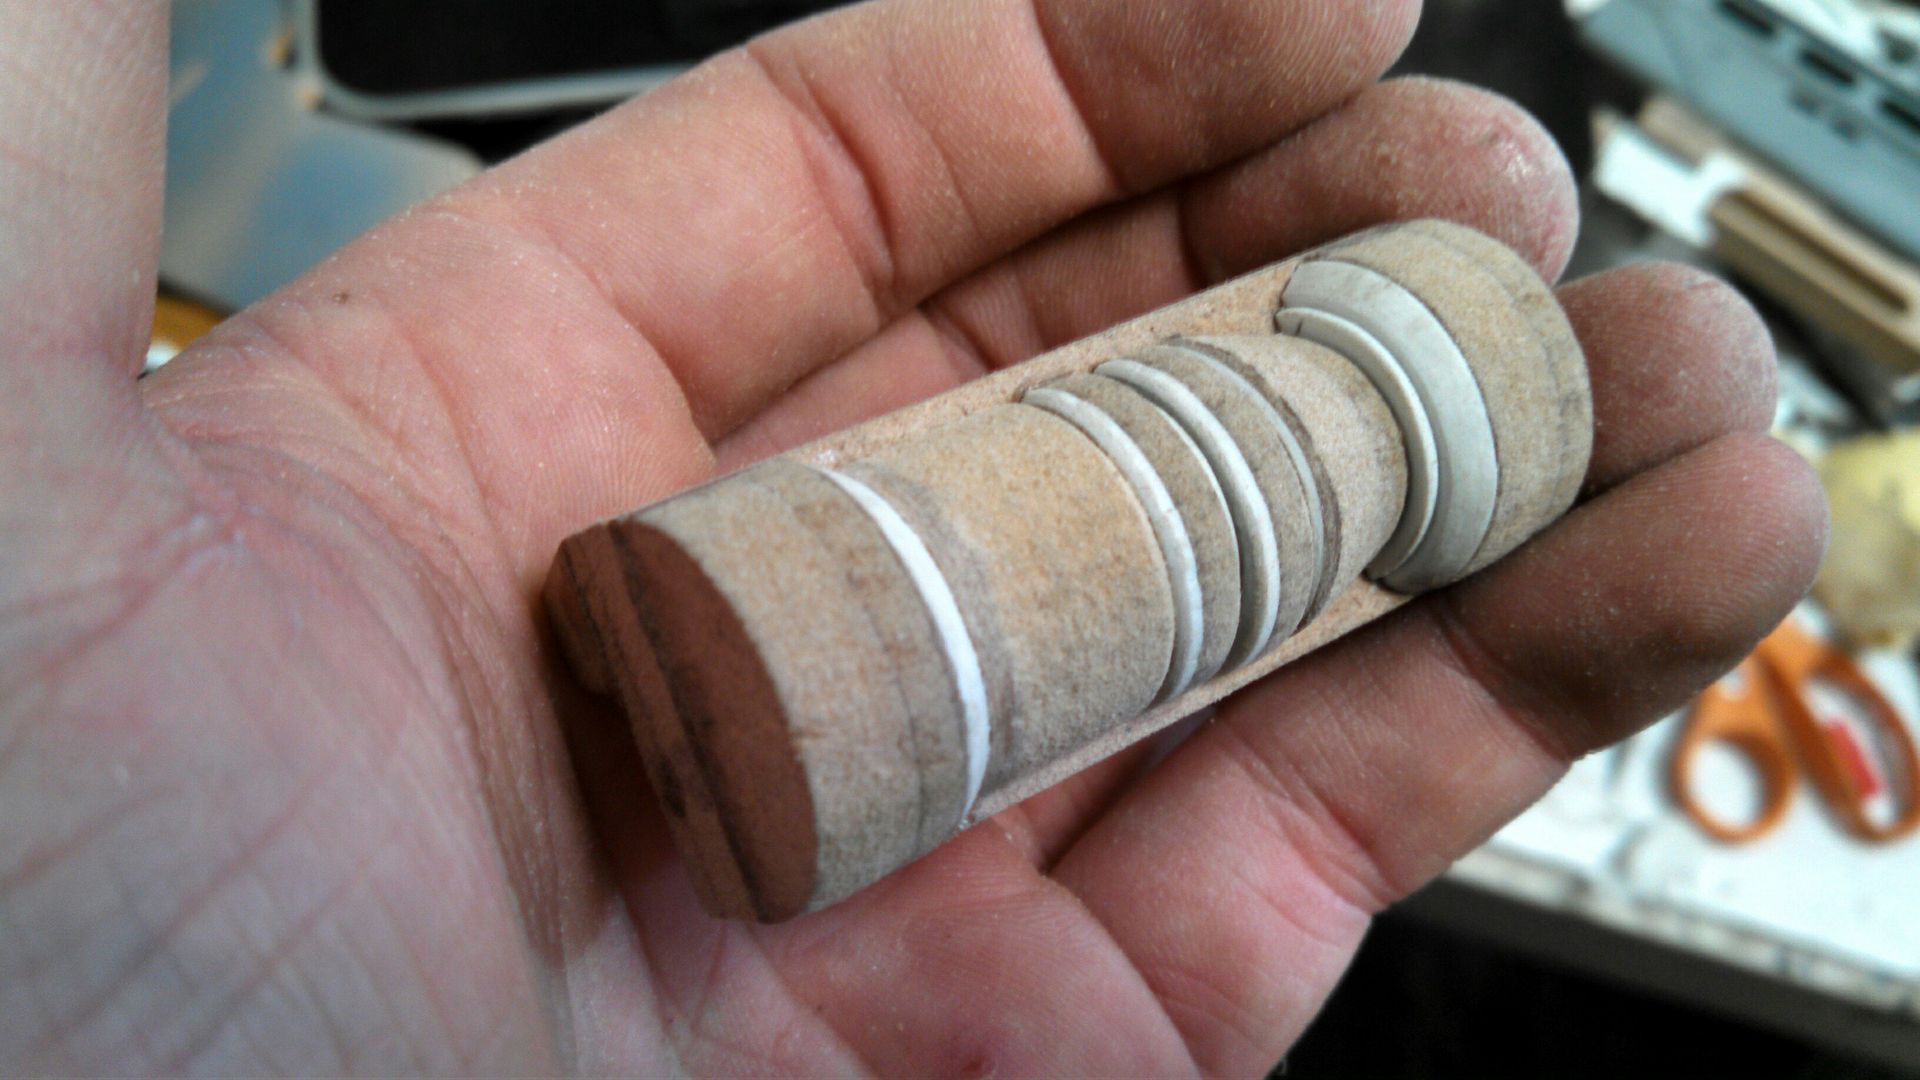
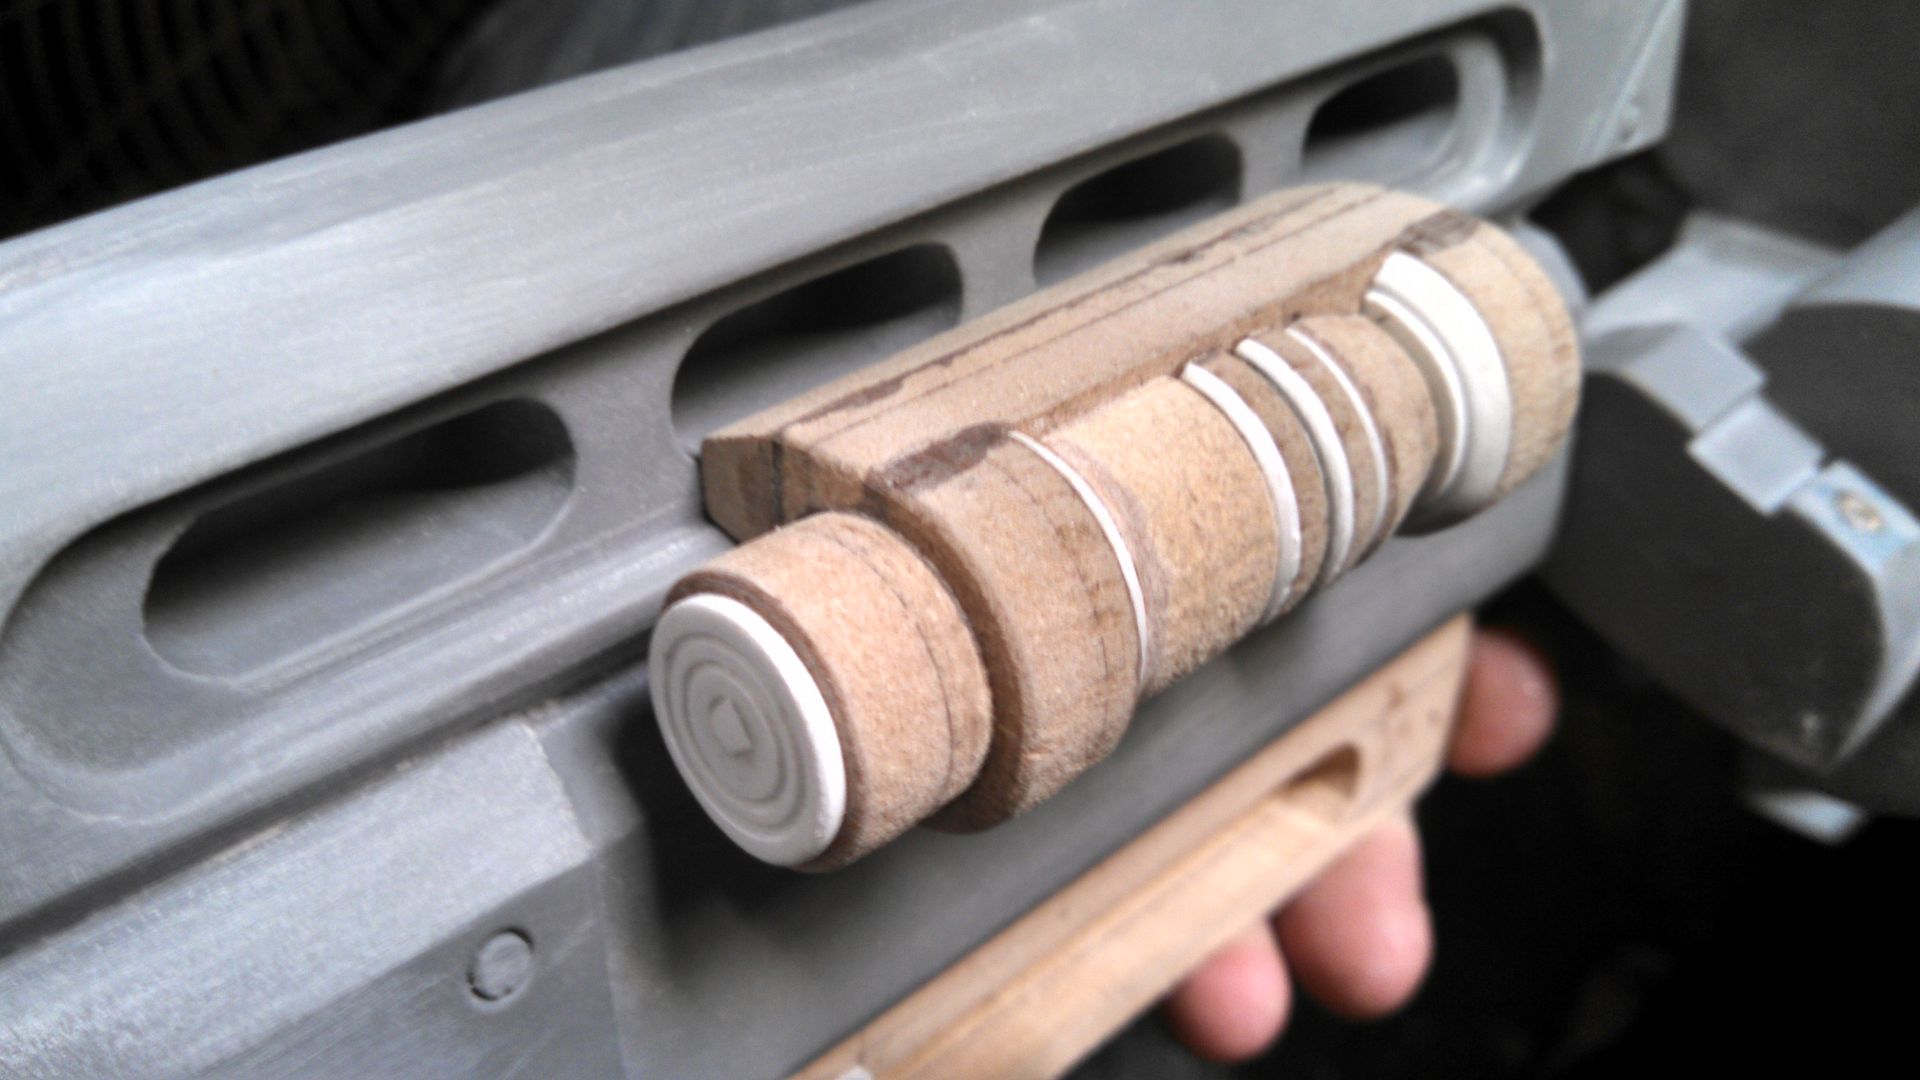
With the 5 casts and the master, I dremeled out the cylinder and installed all of them,
I filled the grooves with bondo and scraped off the excess with a piece of styrene that matched the inverted profile of the cylinder edge.
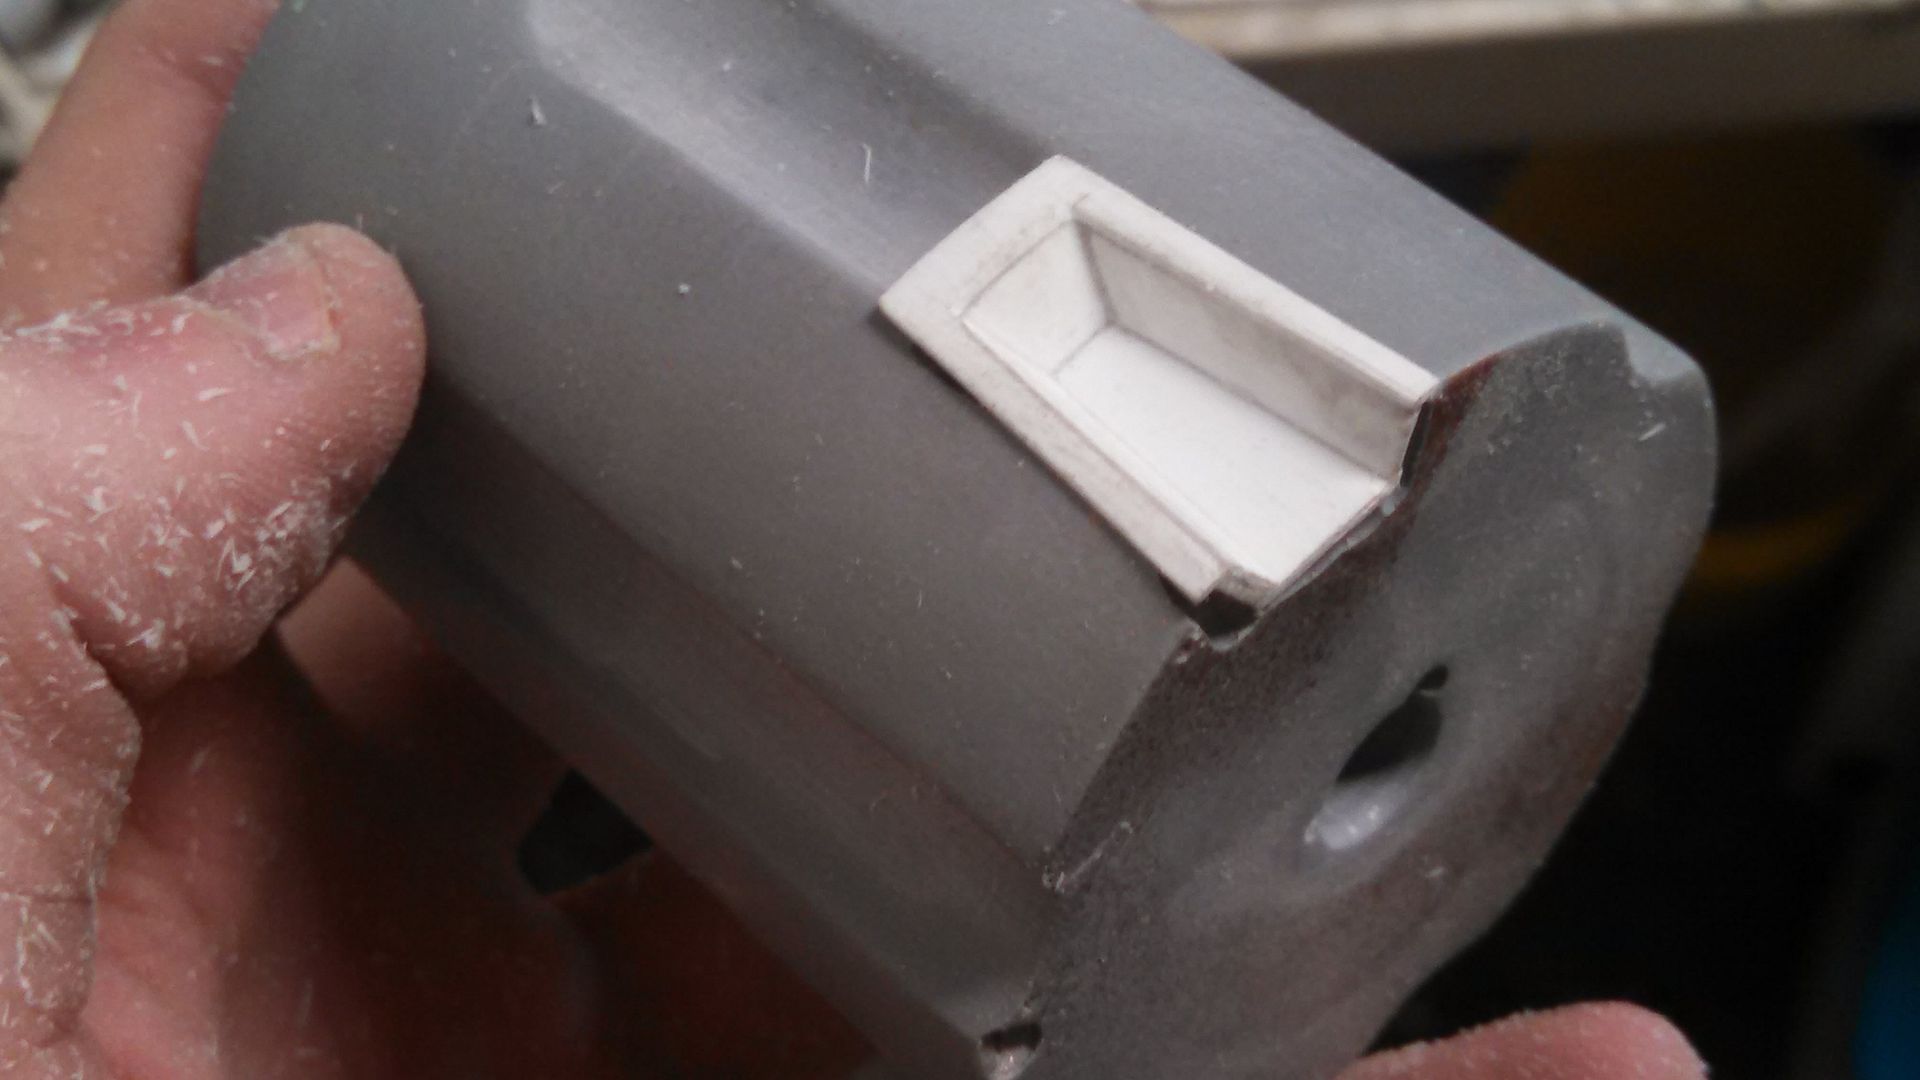
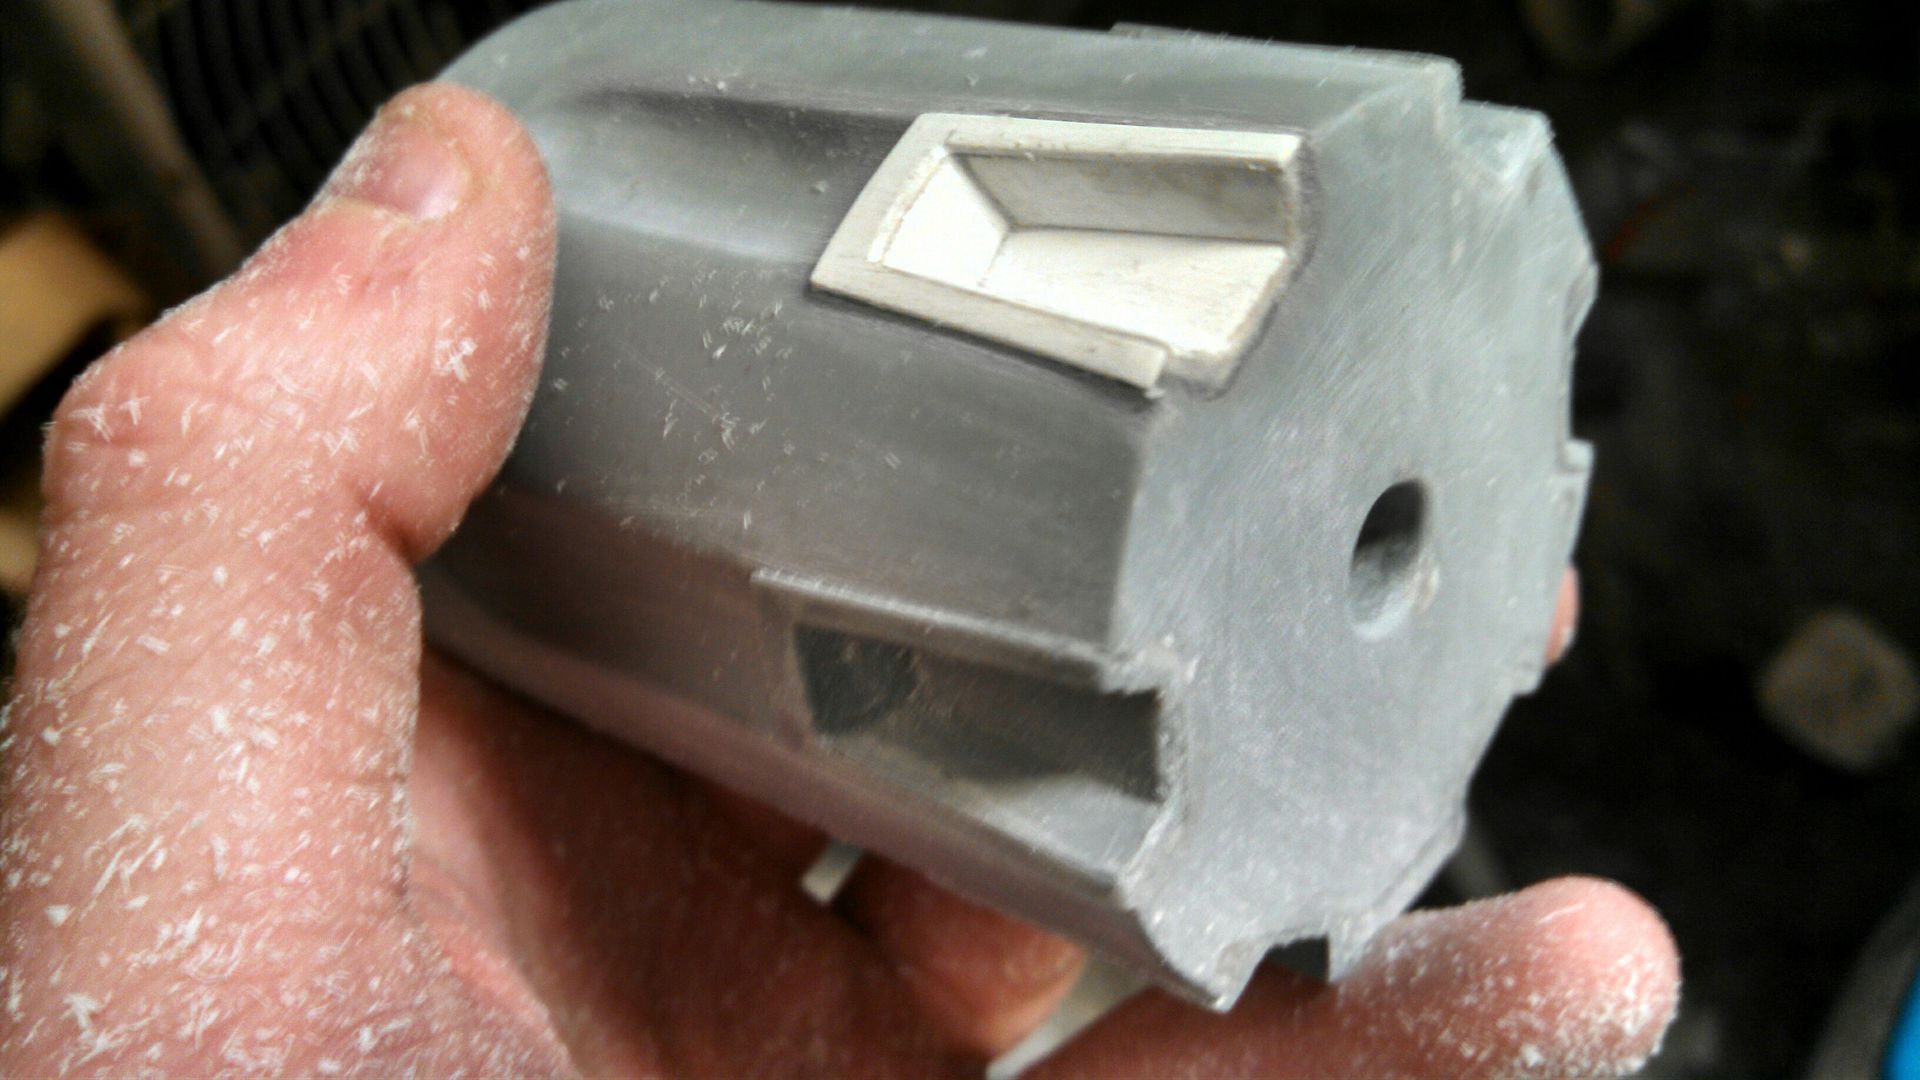
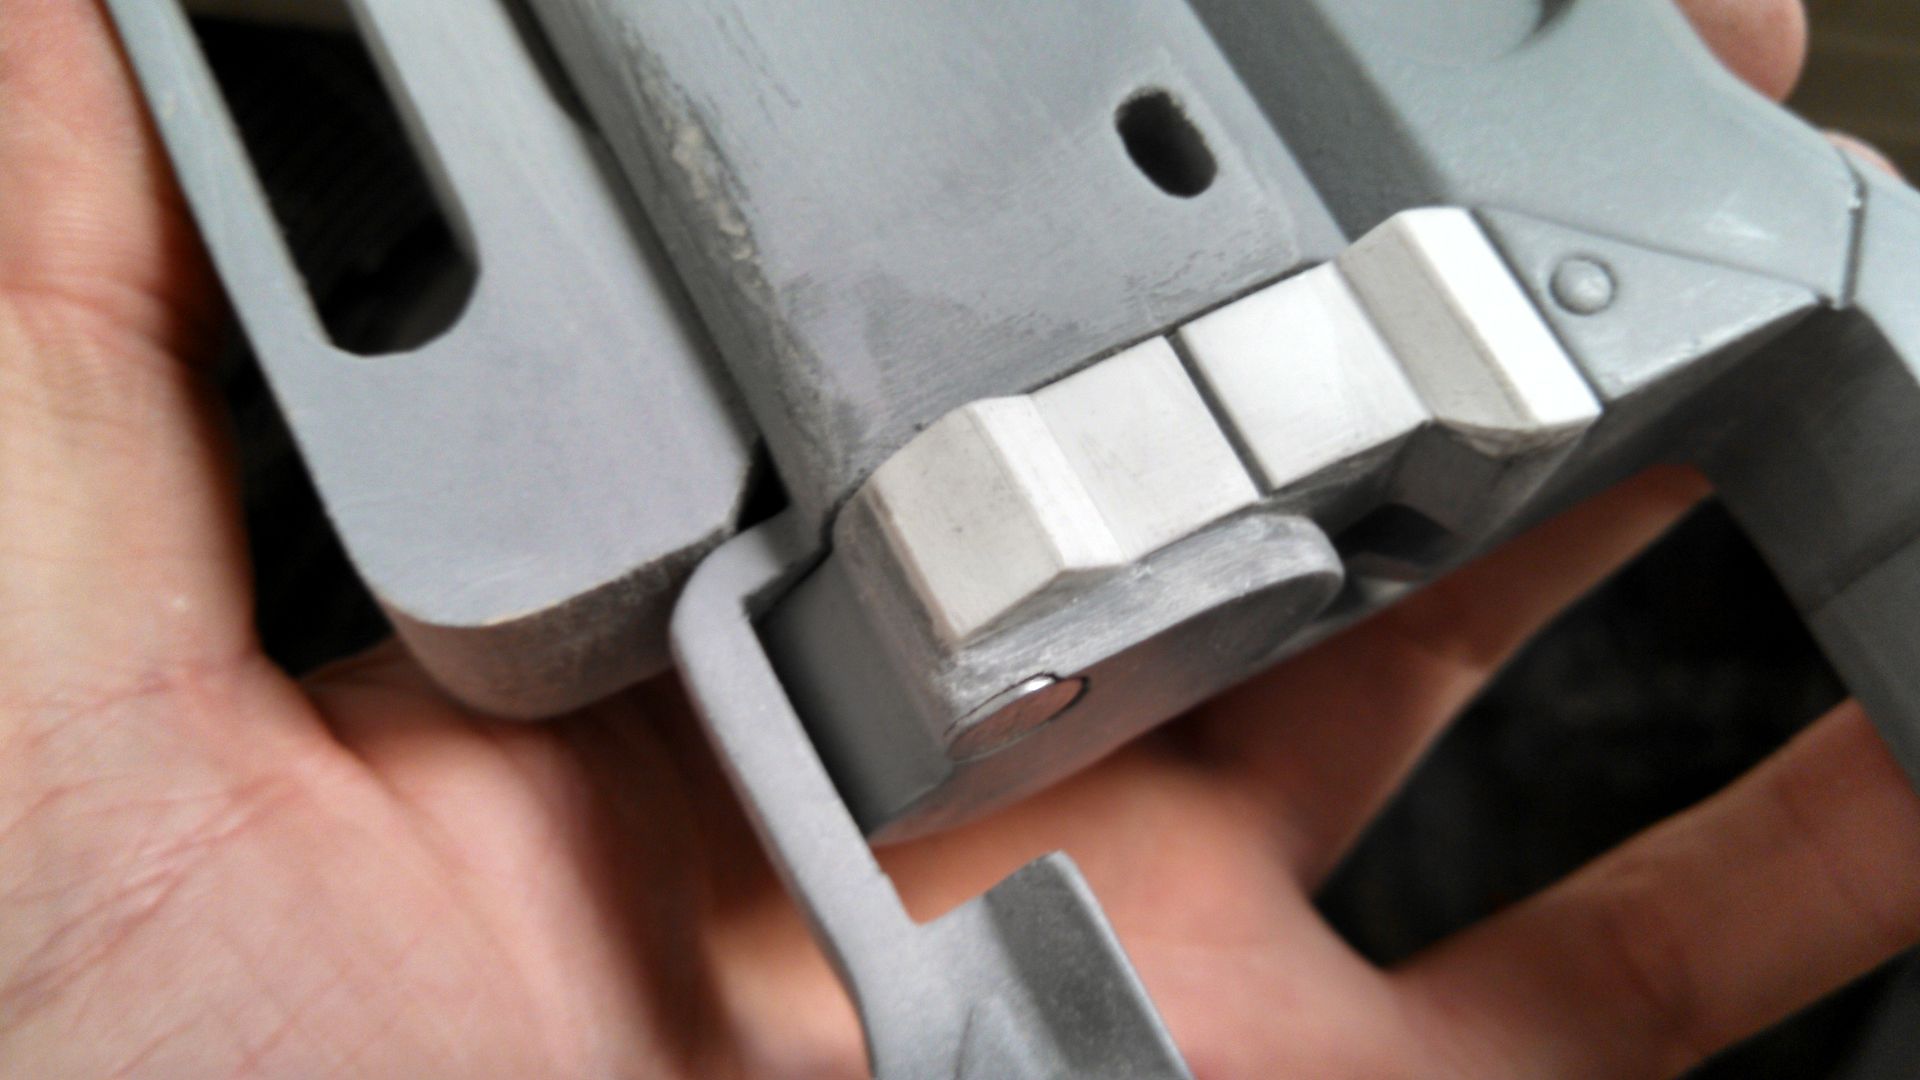
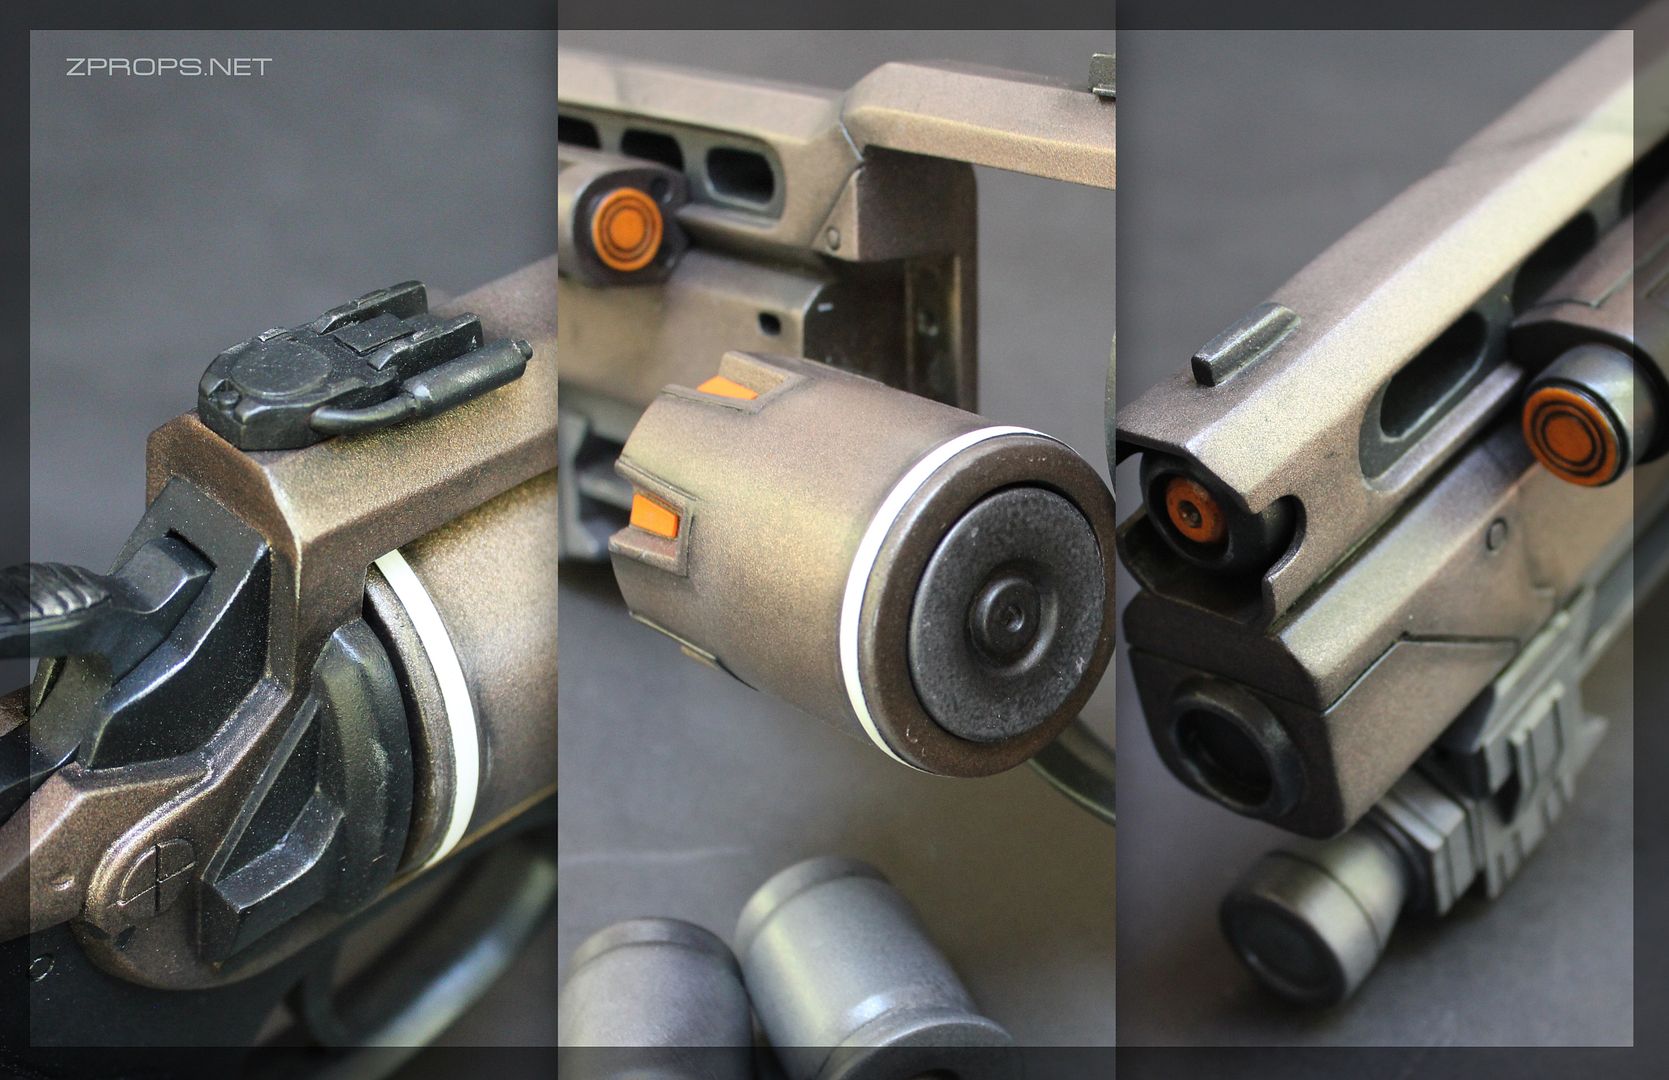
Since the swing arm was already installed on this cast, I had to go back with styrene to make the angular look on top of the old one. I went back and added/drilled out details later.
The rear sight was just...kinda...made.. I didn't really document this part that is about the size of a fingertip. The little tube on the left is aluminum that I bent and embedded in the body of the sight out of fear of it breaking off easily. The original grey sight on the right was completely dremeled off of the cast.

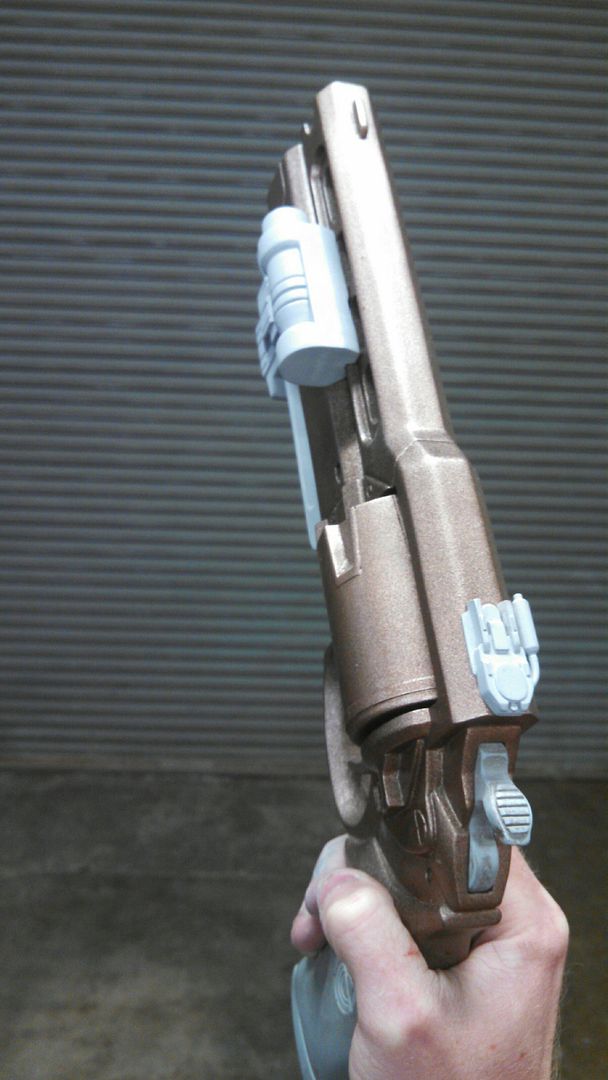
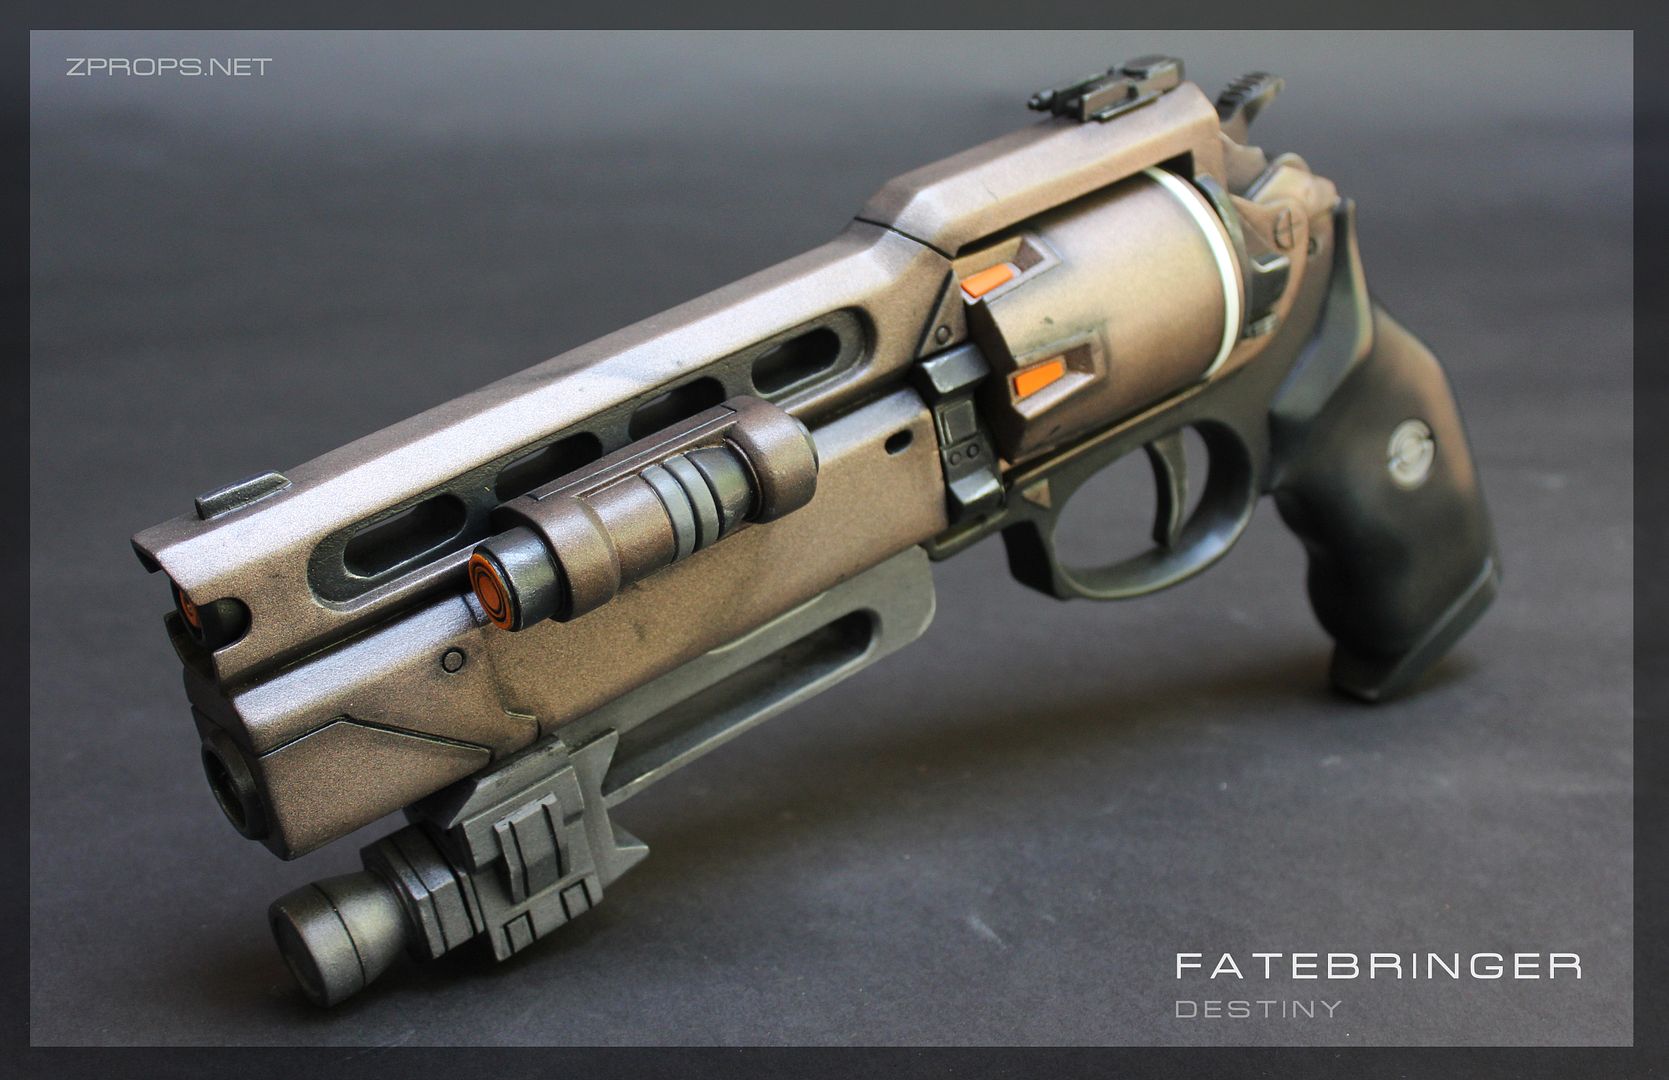
I did a test fit on the cast body which was painted by carefully dusting "aged copper" over a "metallic walnut (Or chestnut? I cant remember) base.
And some careful painting/distressing ends up with this:
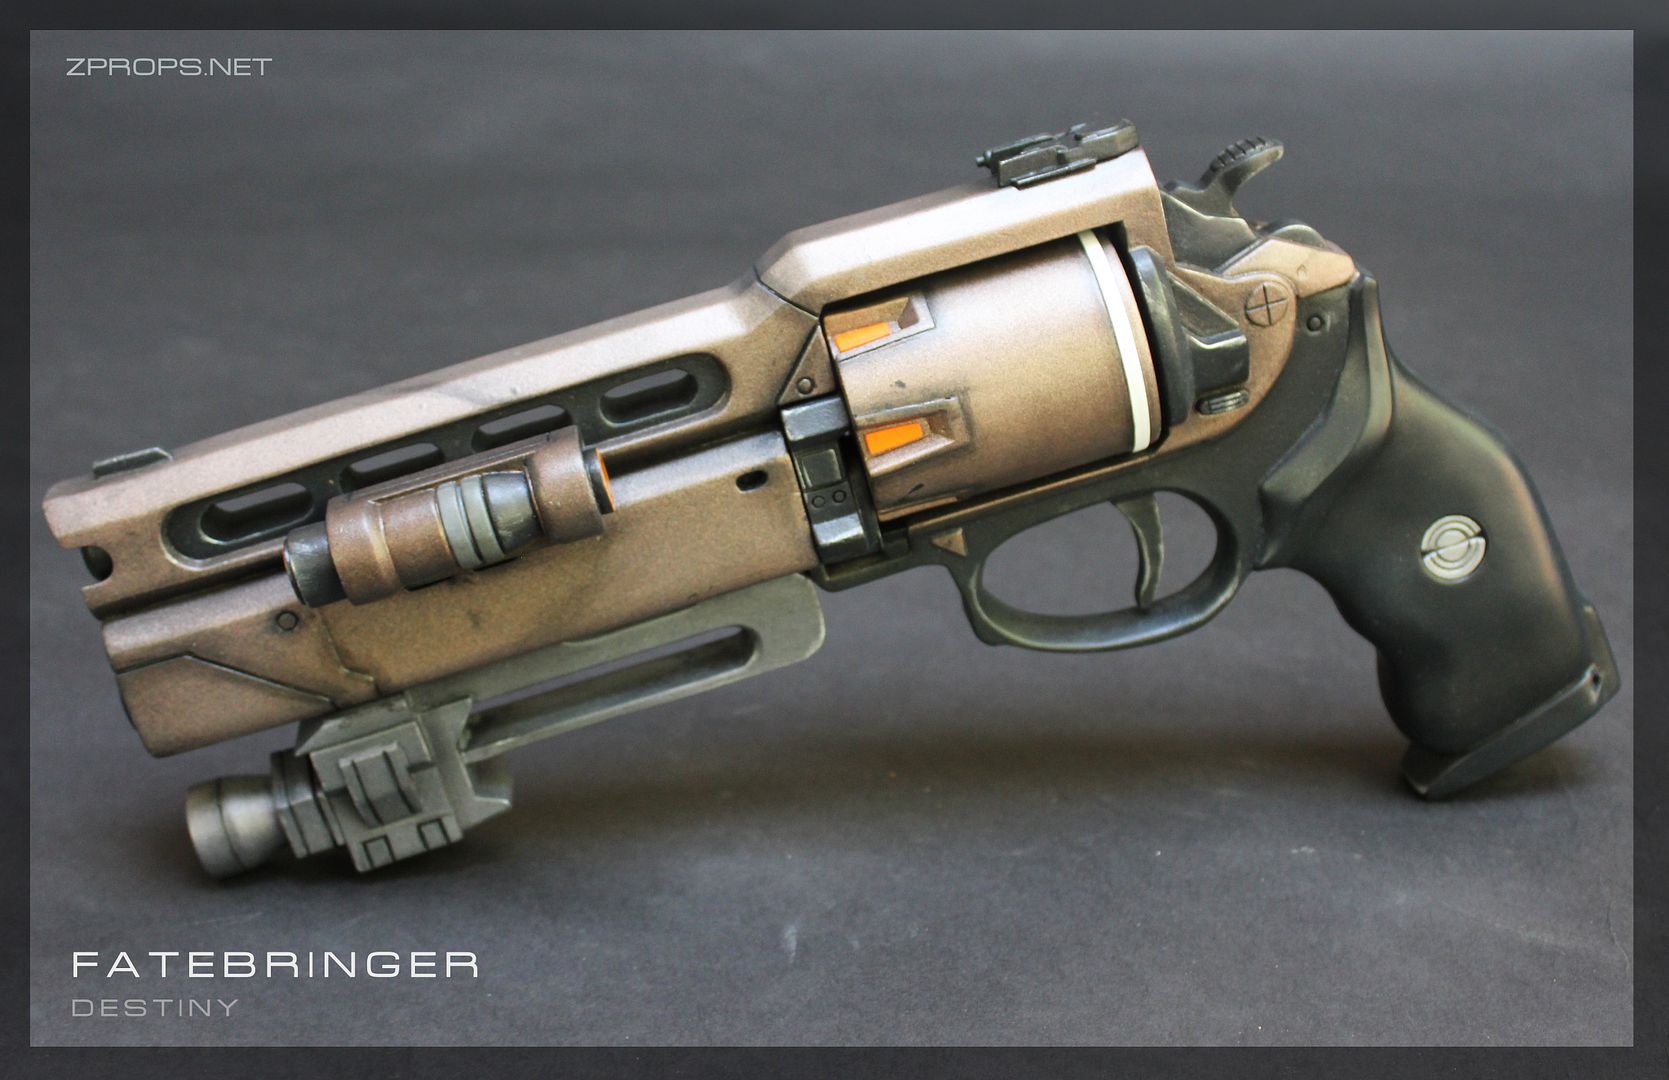
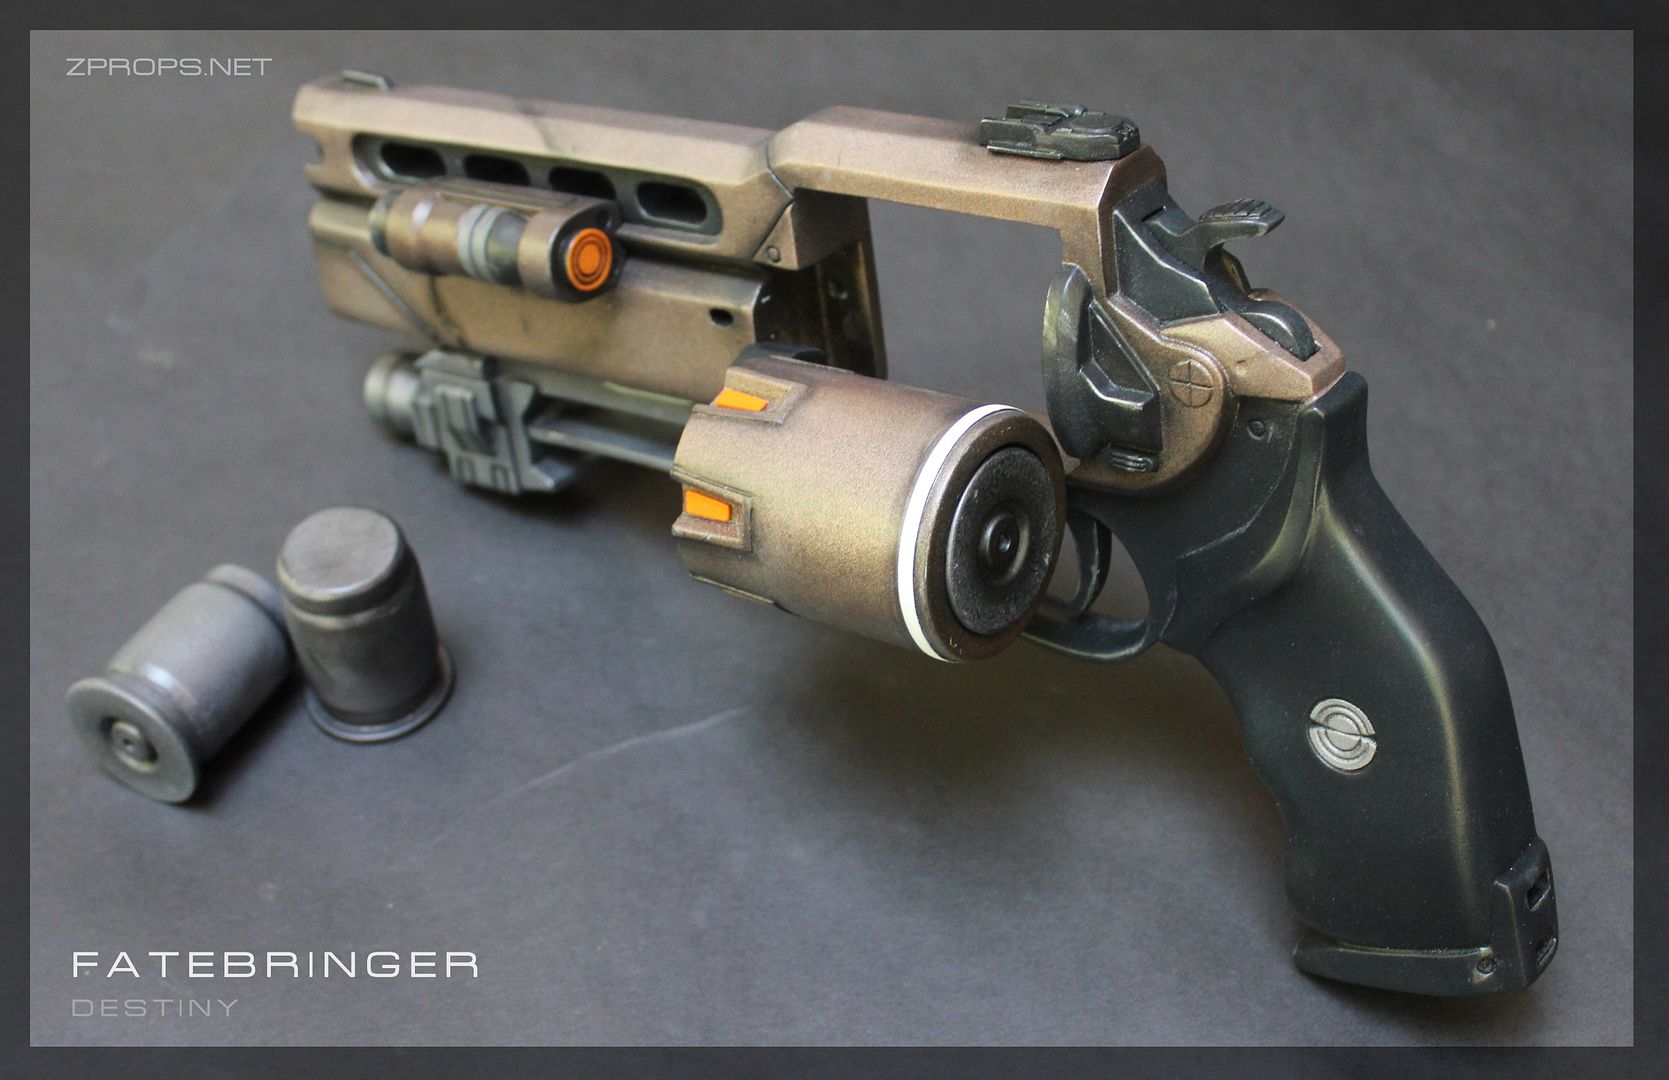
Boom. Headshot.
Interested in a resin kit of this prop? you can grab one here.
Daily WIP photos on Facebook.